Android App Setup in Android Studio
A comprehensive step-by-step guide on how to configure your Android project, change its Package Name appropriately, and link your backend API URL.
Opening the Project in Android Studio
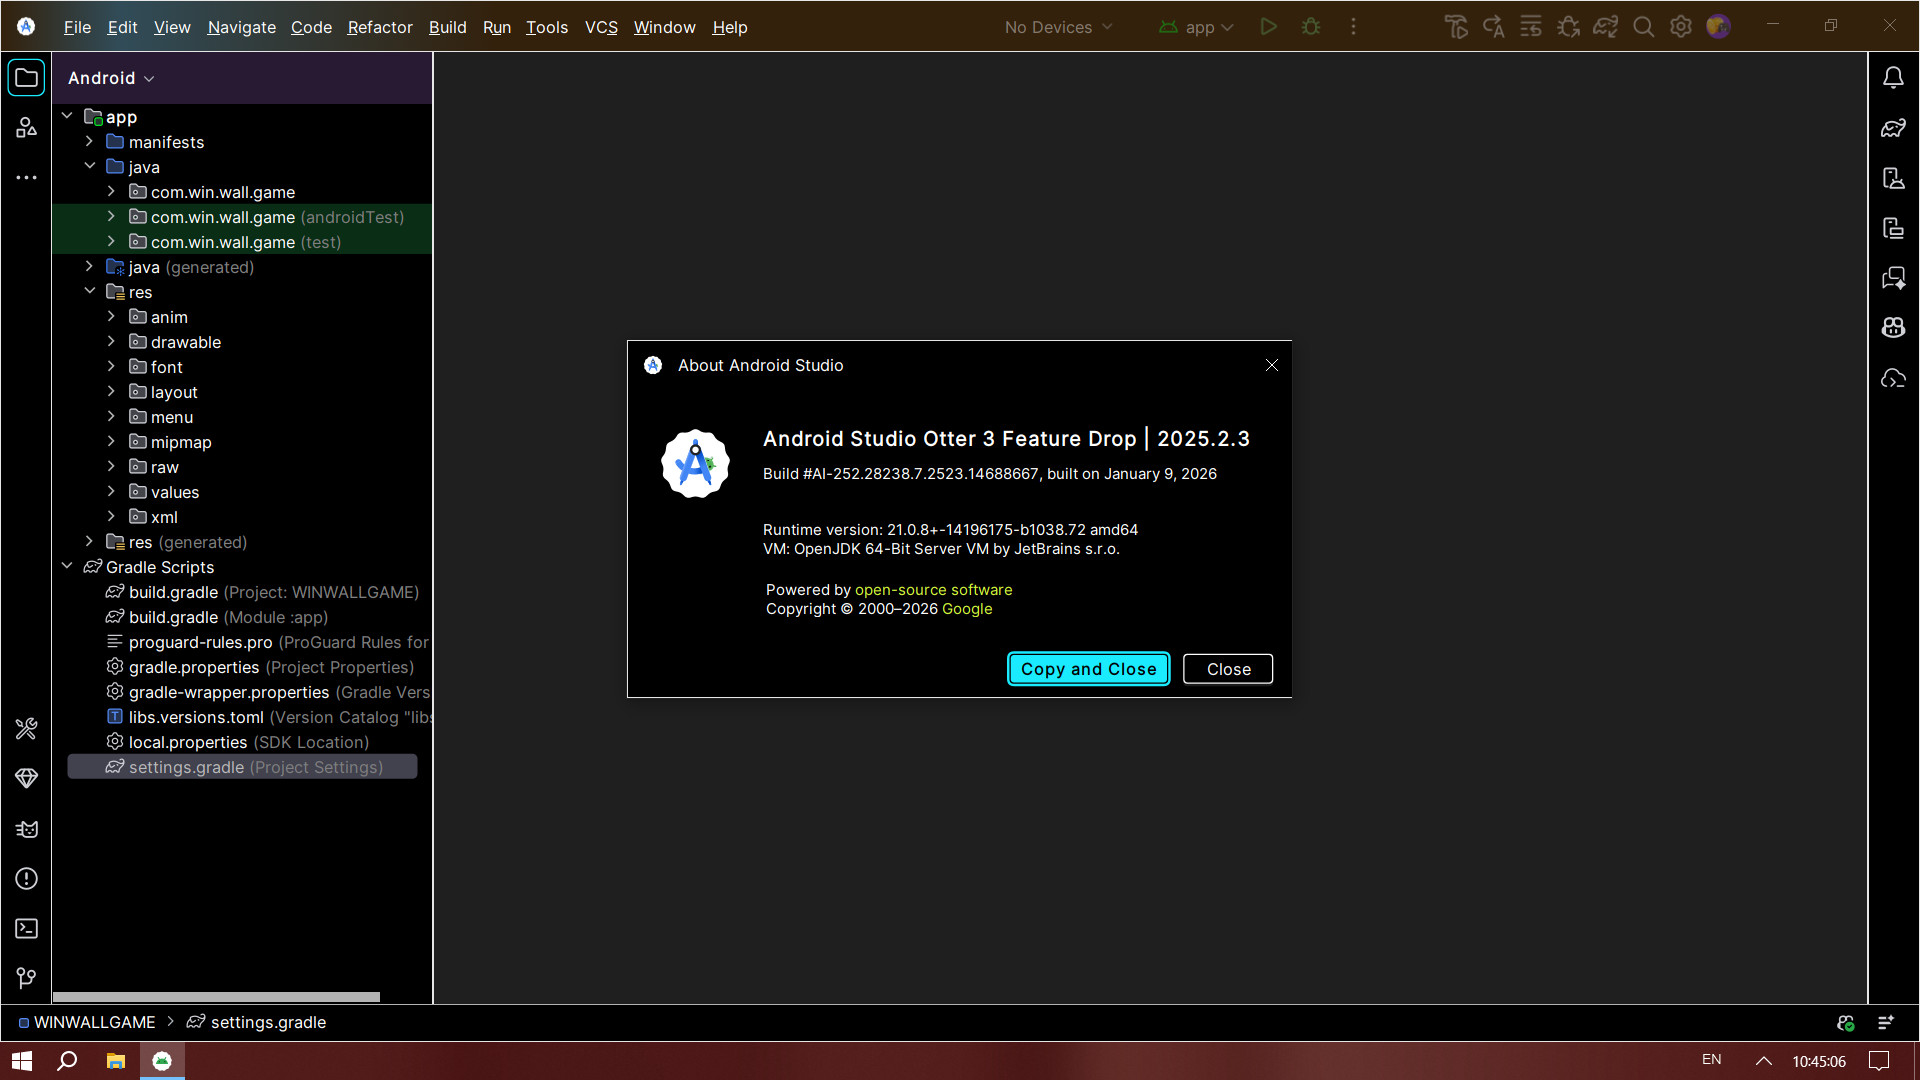
Ensure that you have installed the latest version of Android Studio. If you haven't, please download it from the official Google developer portal.
- Launch Android Studio.
- Click on Open from the welcome screen, or go to
File > Open. - Navigate to the directory where you extracted the Android app source code and select the root folder of the project.
- Wait for Android Studio to index the files and complete the initial Gradle Sync. This might take a few minutes.
Changing the Package Name (Part 1 - Setup)
To successfully change the package name (the unique identifier for your app on the Google Play Store), you need to change how the project structure is displayed.
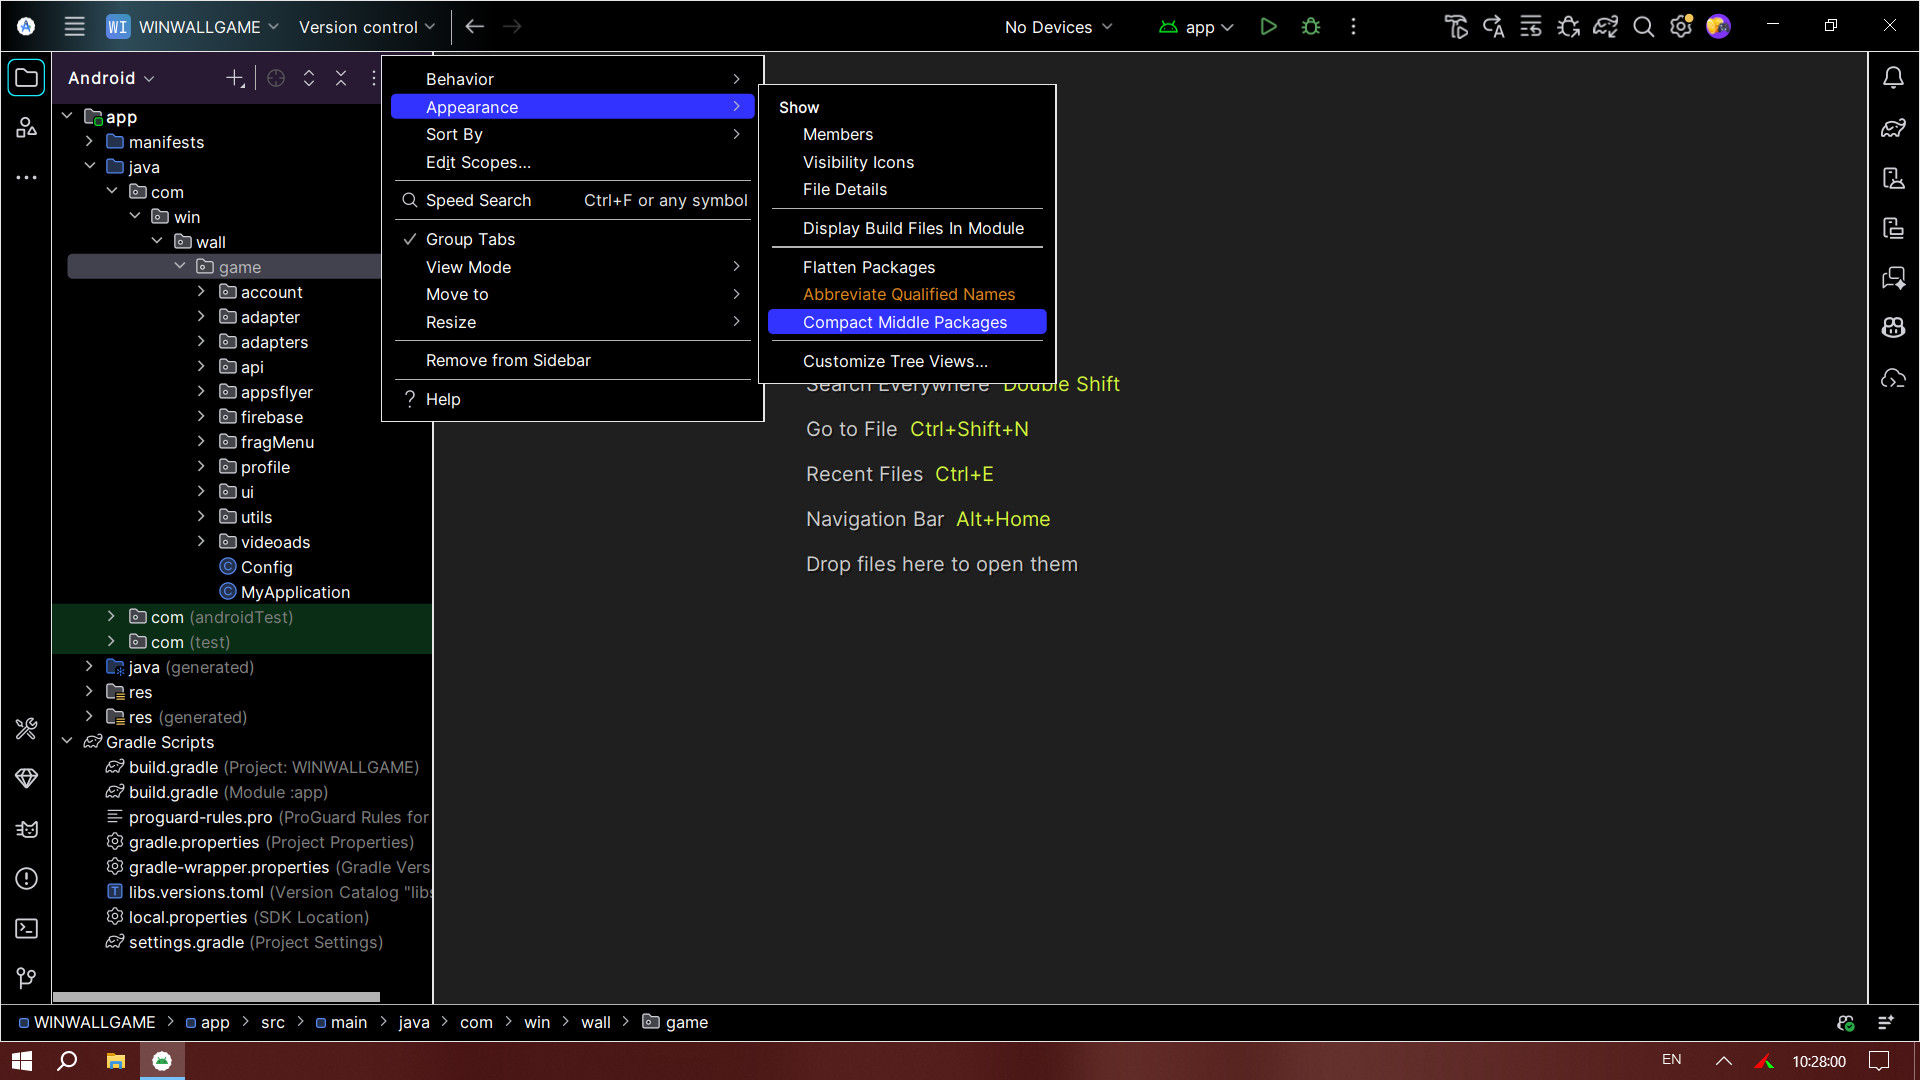
- In the left Project Panel, make sure you are in the Android view.
- Click on the Gear Icon (Settings) located at the top right of the Project Panel.
- Uncheck the option Compact Middle Packages (or Compact Empty Middle Packages, depending on your Android Studio version).
Disabling this option visually separates the package folders (e.g., com.example.app becomes three separate folders: com > example > app), allowing you to rename the specific part of the package name you want.

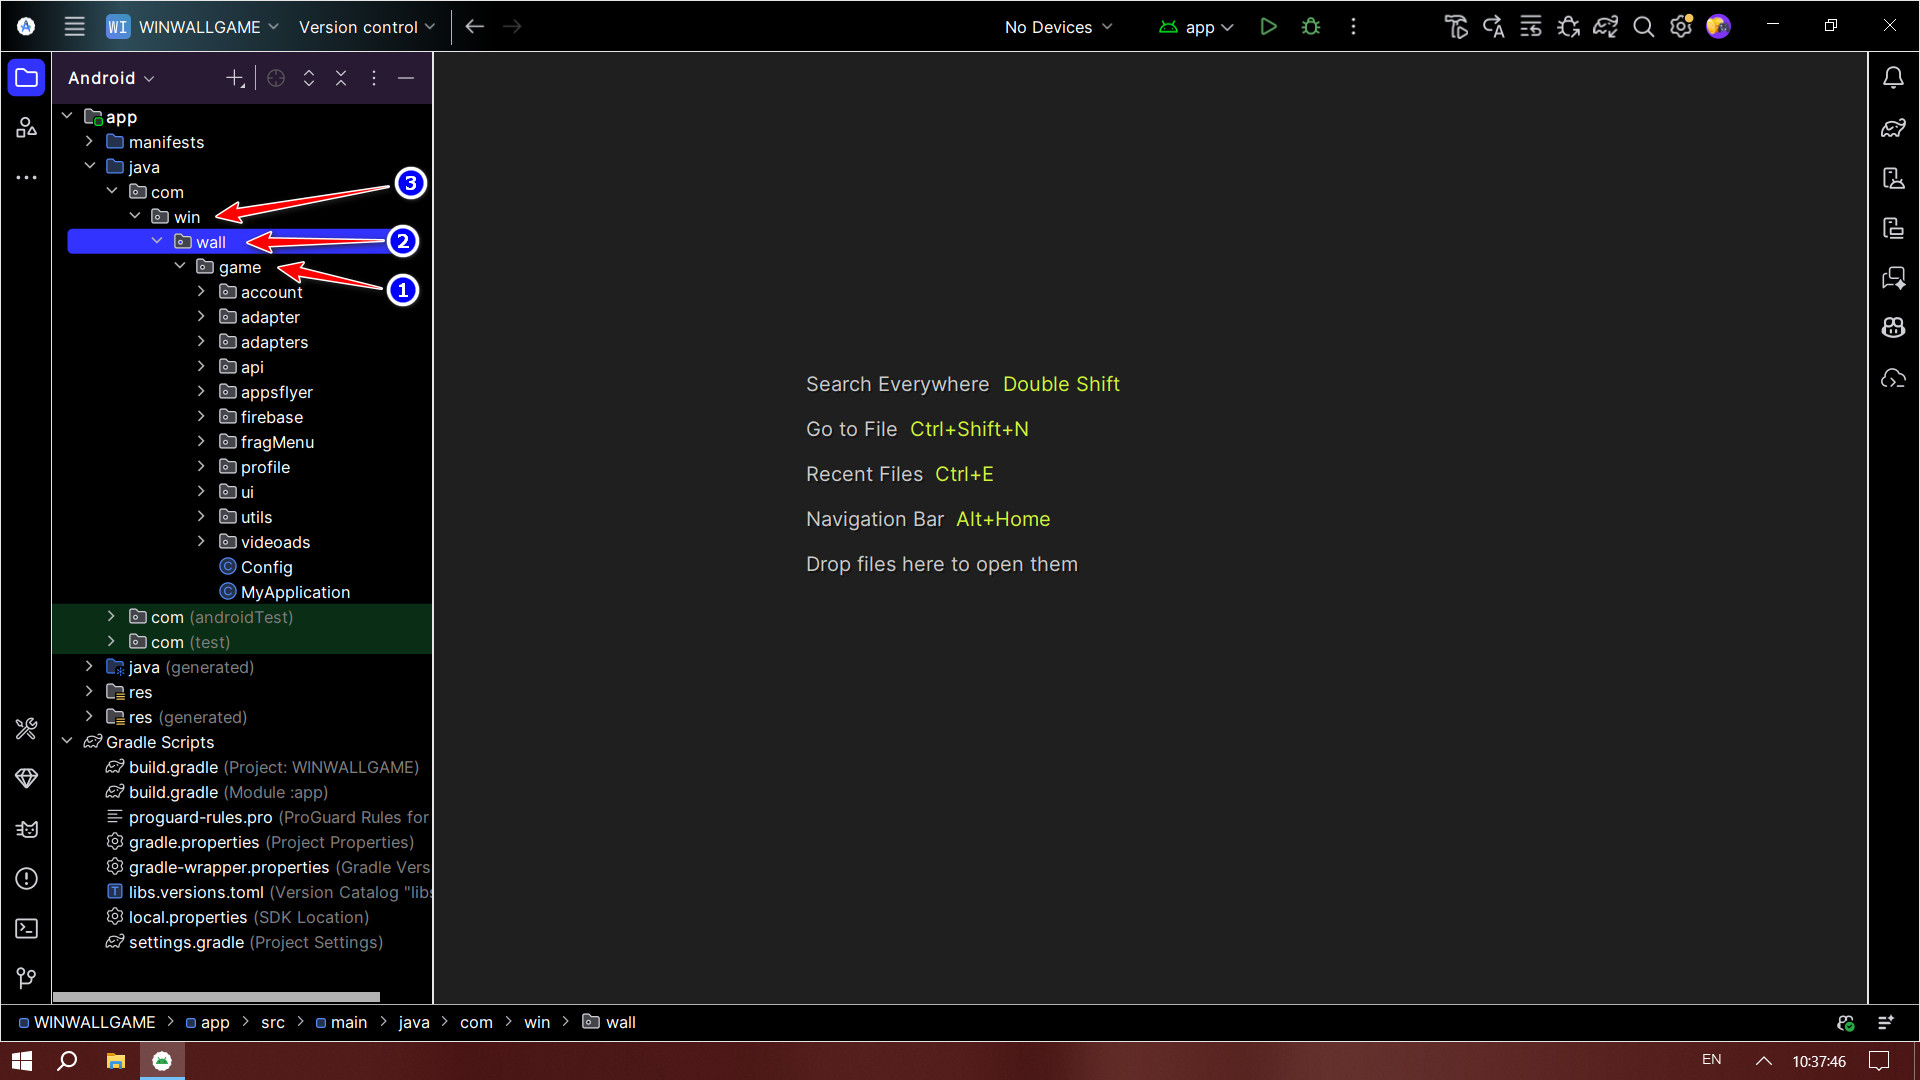
Changing the Package Name (Part 2 - Rename & Refactor)
Now that your directories are separated, you can comfortably rename your application's unique ID.
- Navigate to
app > java. Your current package name will be split (e.g.,com, then the middle name, then the app name). - Right-click on the folder you wish to rename (usually the middle name or the app name).
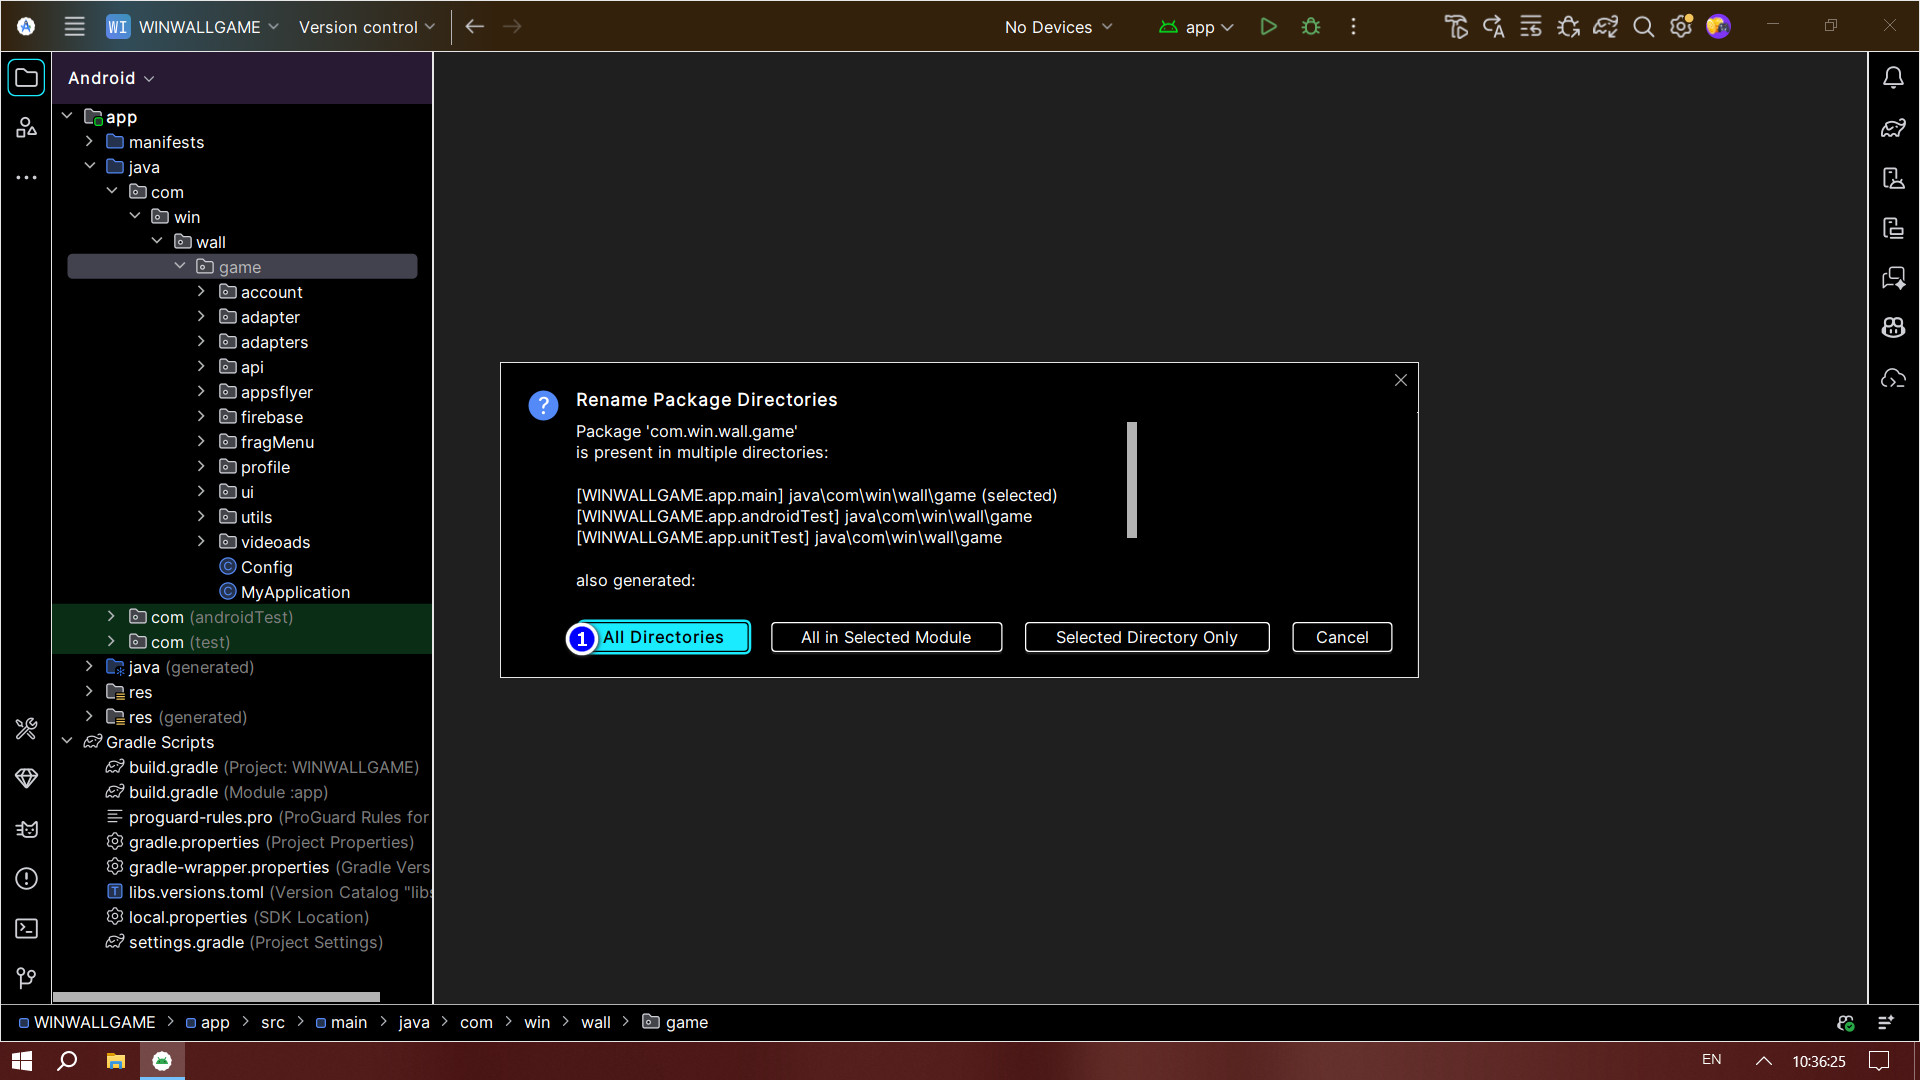
- Select Refactor > Rename (or press
Shift + F6). - A prompt might appear asking if you want to rename the directory or the package. Select Rename package.
- Enter your new identifying name in the dialog box and click Refactor.
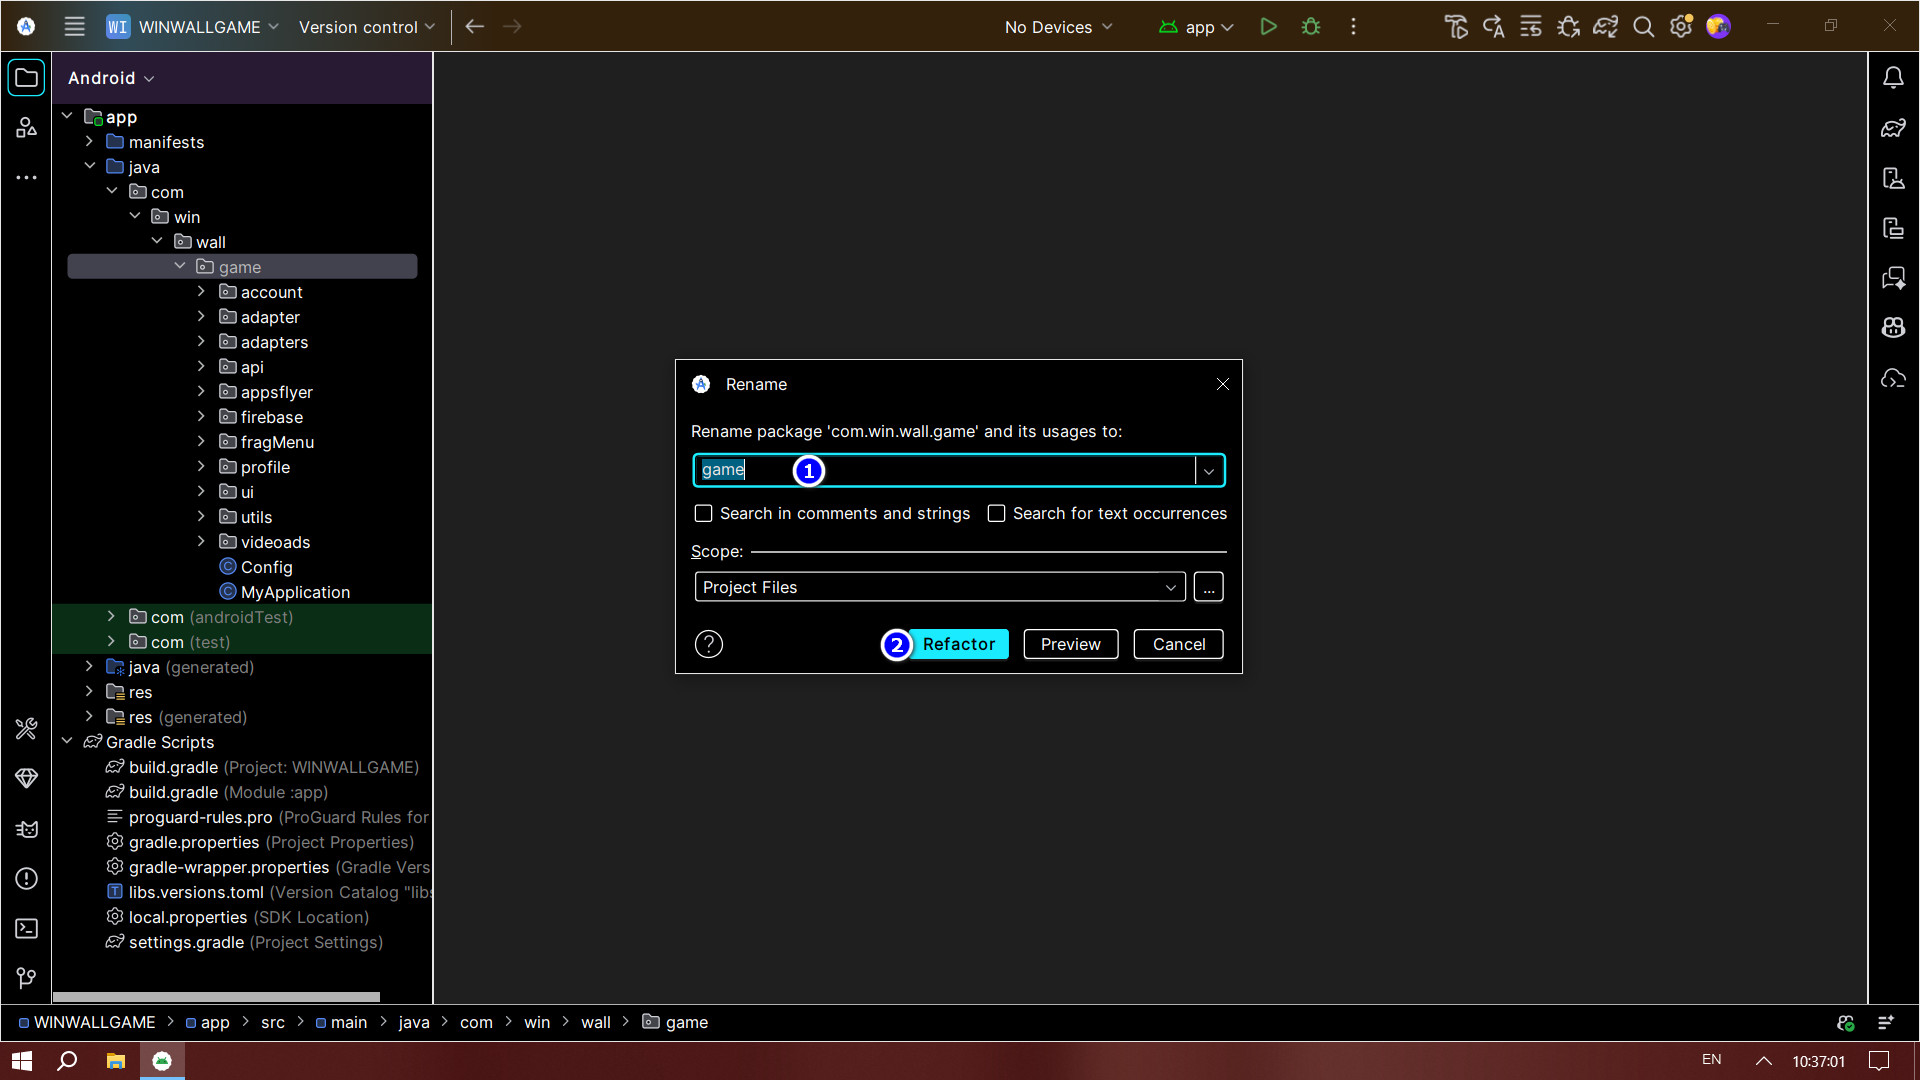
In the bottom-left pane, Android Studio will preview the changes. Click Do Refactor to finalize updating the paths everywhere in your Android code.
Linking to Your API Domain
For your application to communicate with your server, you must assign your specific backend domain URL to the app's configuration.
- In the left project explorer, navigate to the constant strings or API configuration file as shown below.
- Locate the
BASE_URLorAPI_URLconstant variable. - Replace the default placeholder URL with your actual administrative domain endpoint (e.g.,
https://your-domain.com/). - Save the file.
/ if required by your network configuration, and always use https:// for security.
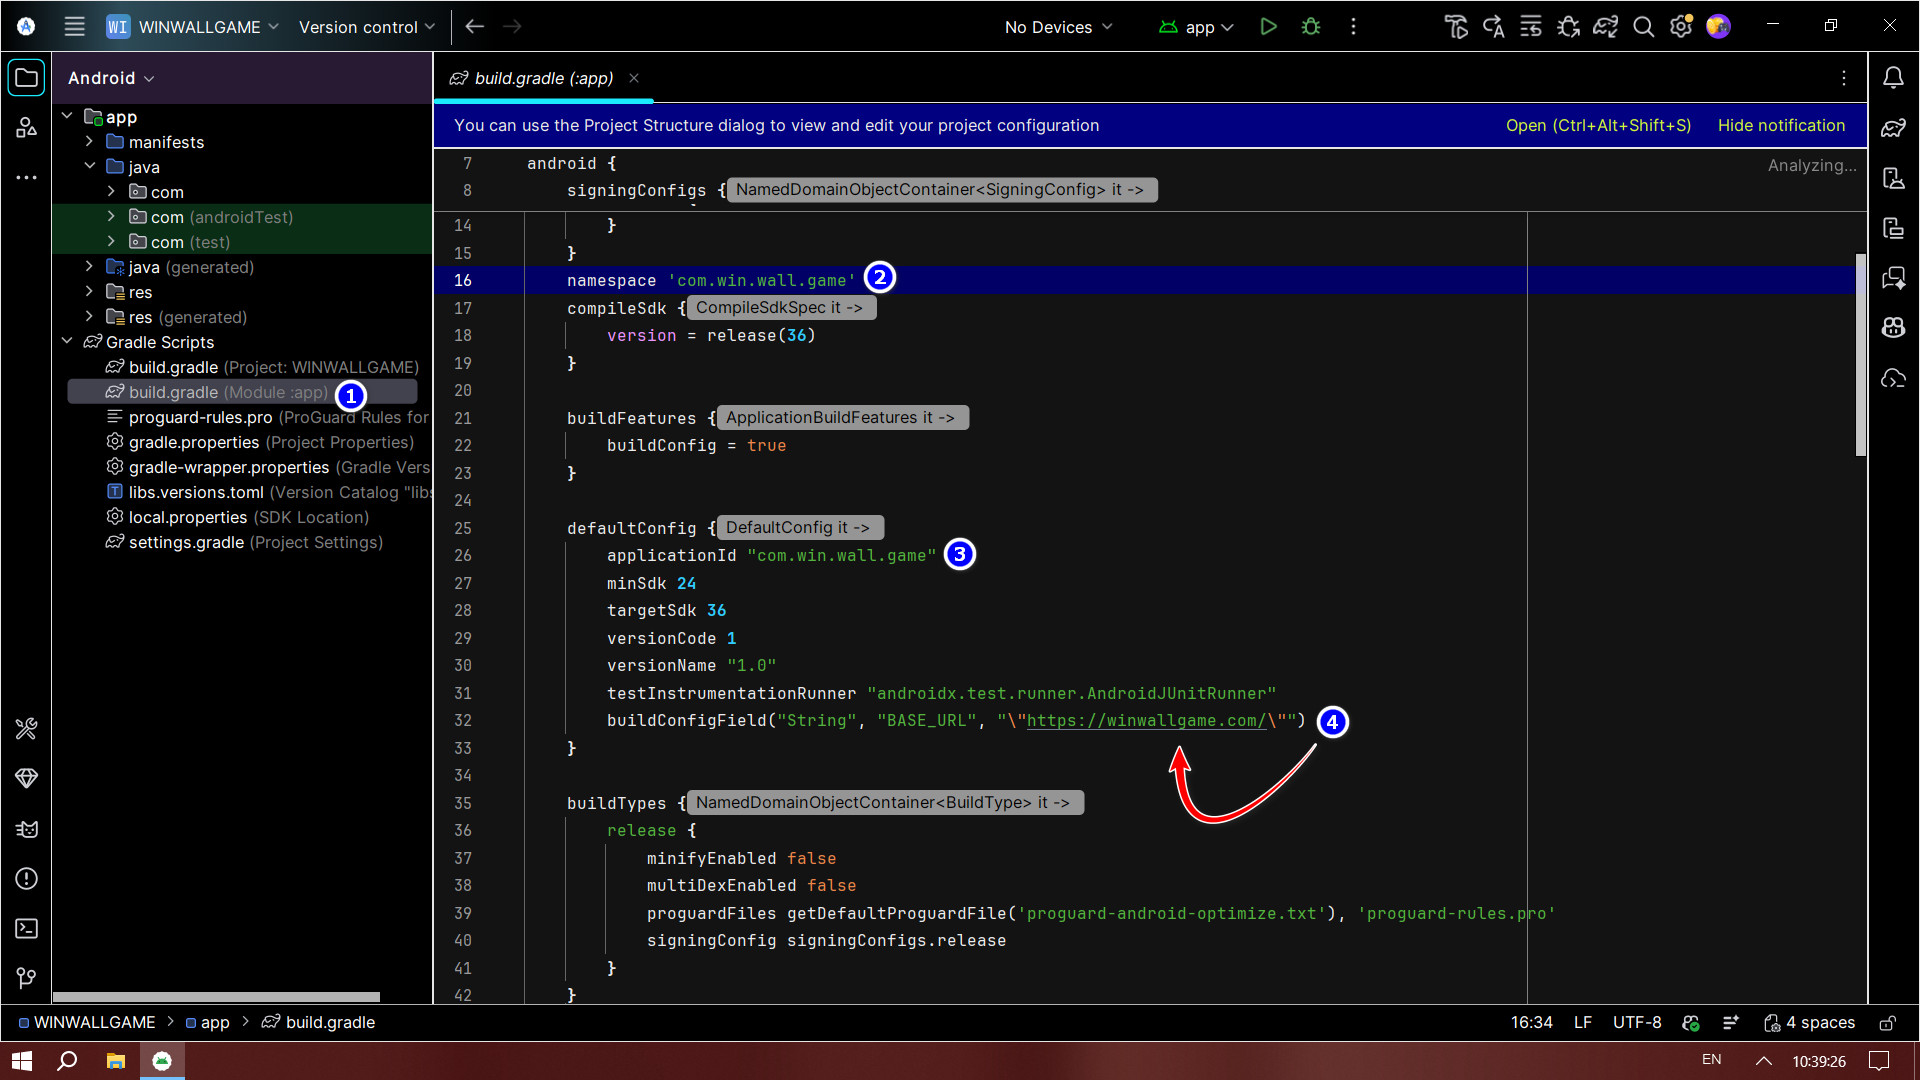
Updating Final App Configurations
To conclude the setup, review any remaining configuration strings associated with your app name and services.
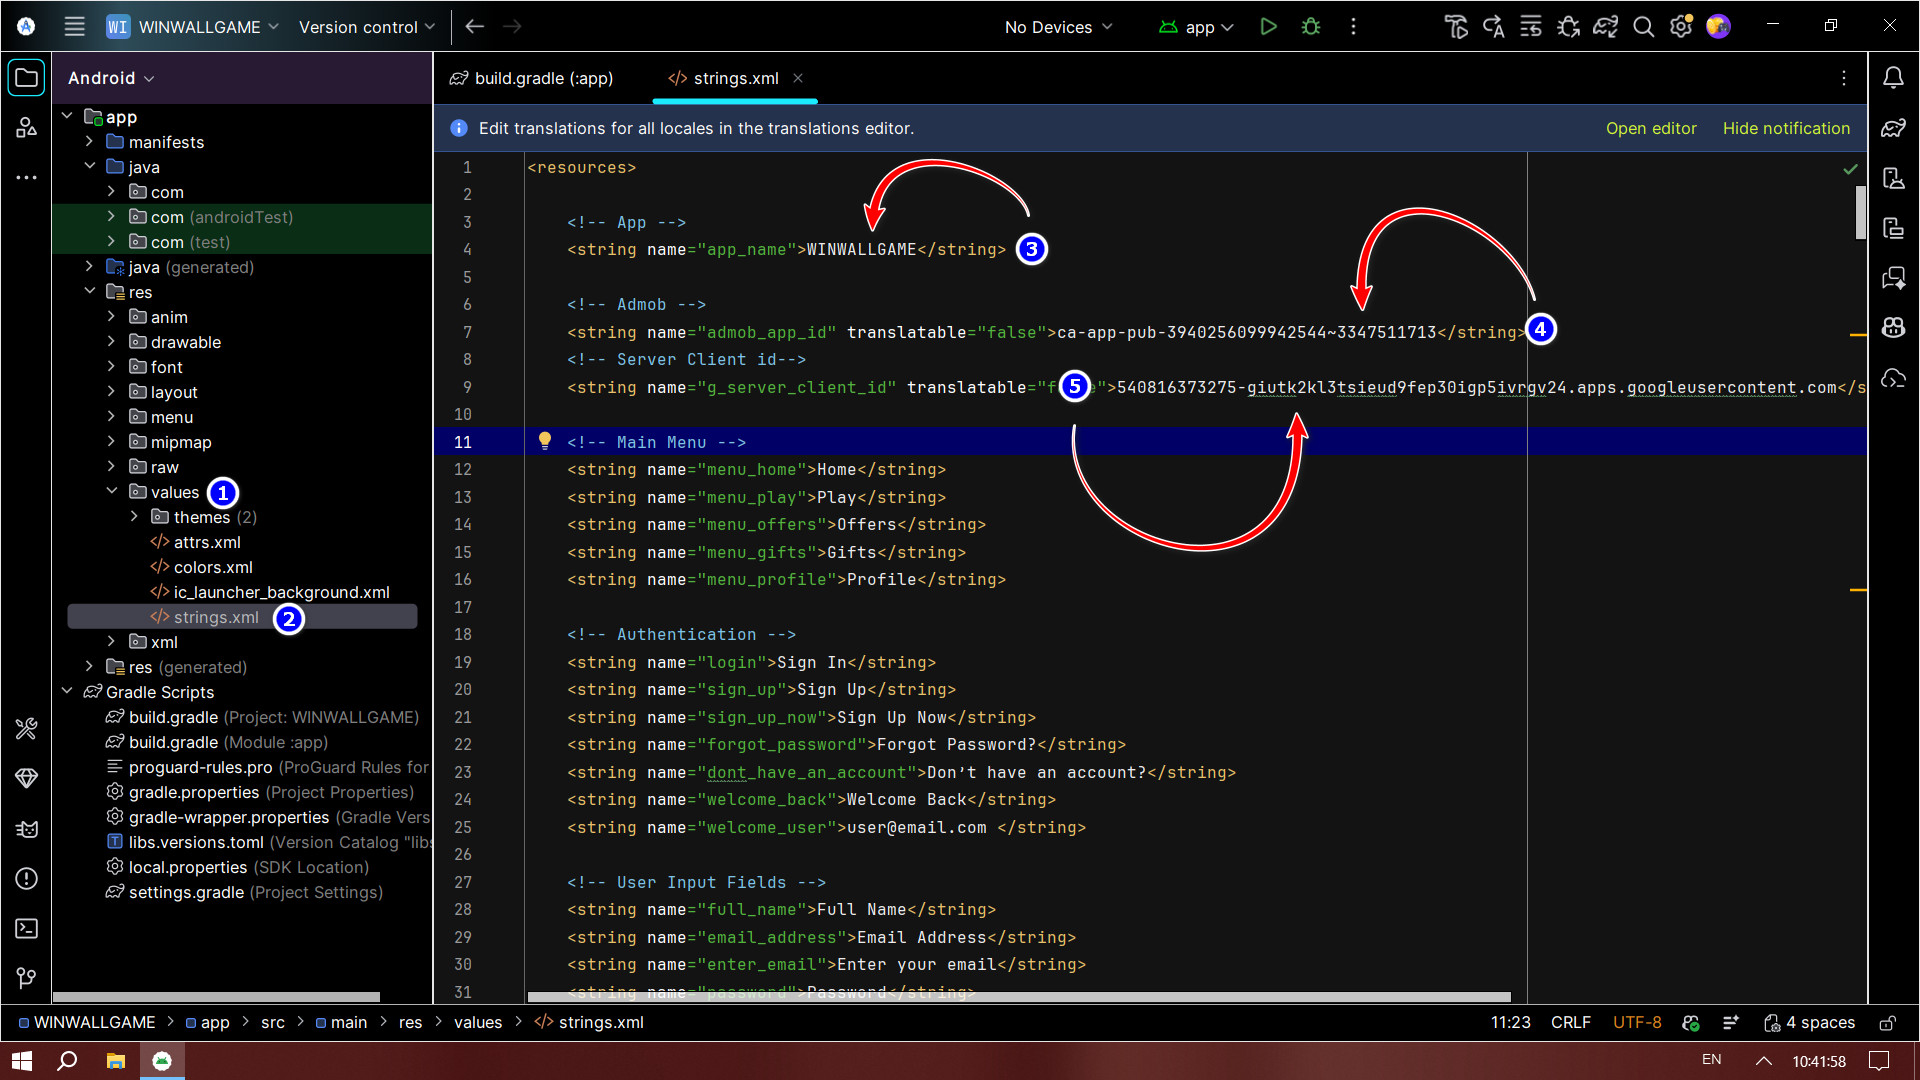
- Navigate to your manifest or
build.gradlefile (Module: app) to verify theapplicationIdmatches your new package name. - Check your
strings.xmlfile (underres > values) and update yourapp_namestring to your desired public application name. - Review the remaining configuration parameters indicated in the file below to ensure all URLs, API keys, and environment variables are properly mapped to your hosting layout.
- Once done, run Build > Clean Project followed by Build > Rebuild Project.