Push Notifications Setup (FCM)
A complete visual guide to configure Firebase Cloud Messaging for your Android app. Covers signing configuration, SHA-1 fingerprint, Firebase project linking, and uploading the service account key to your hosting.
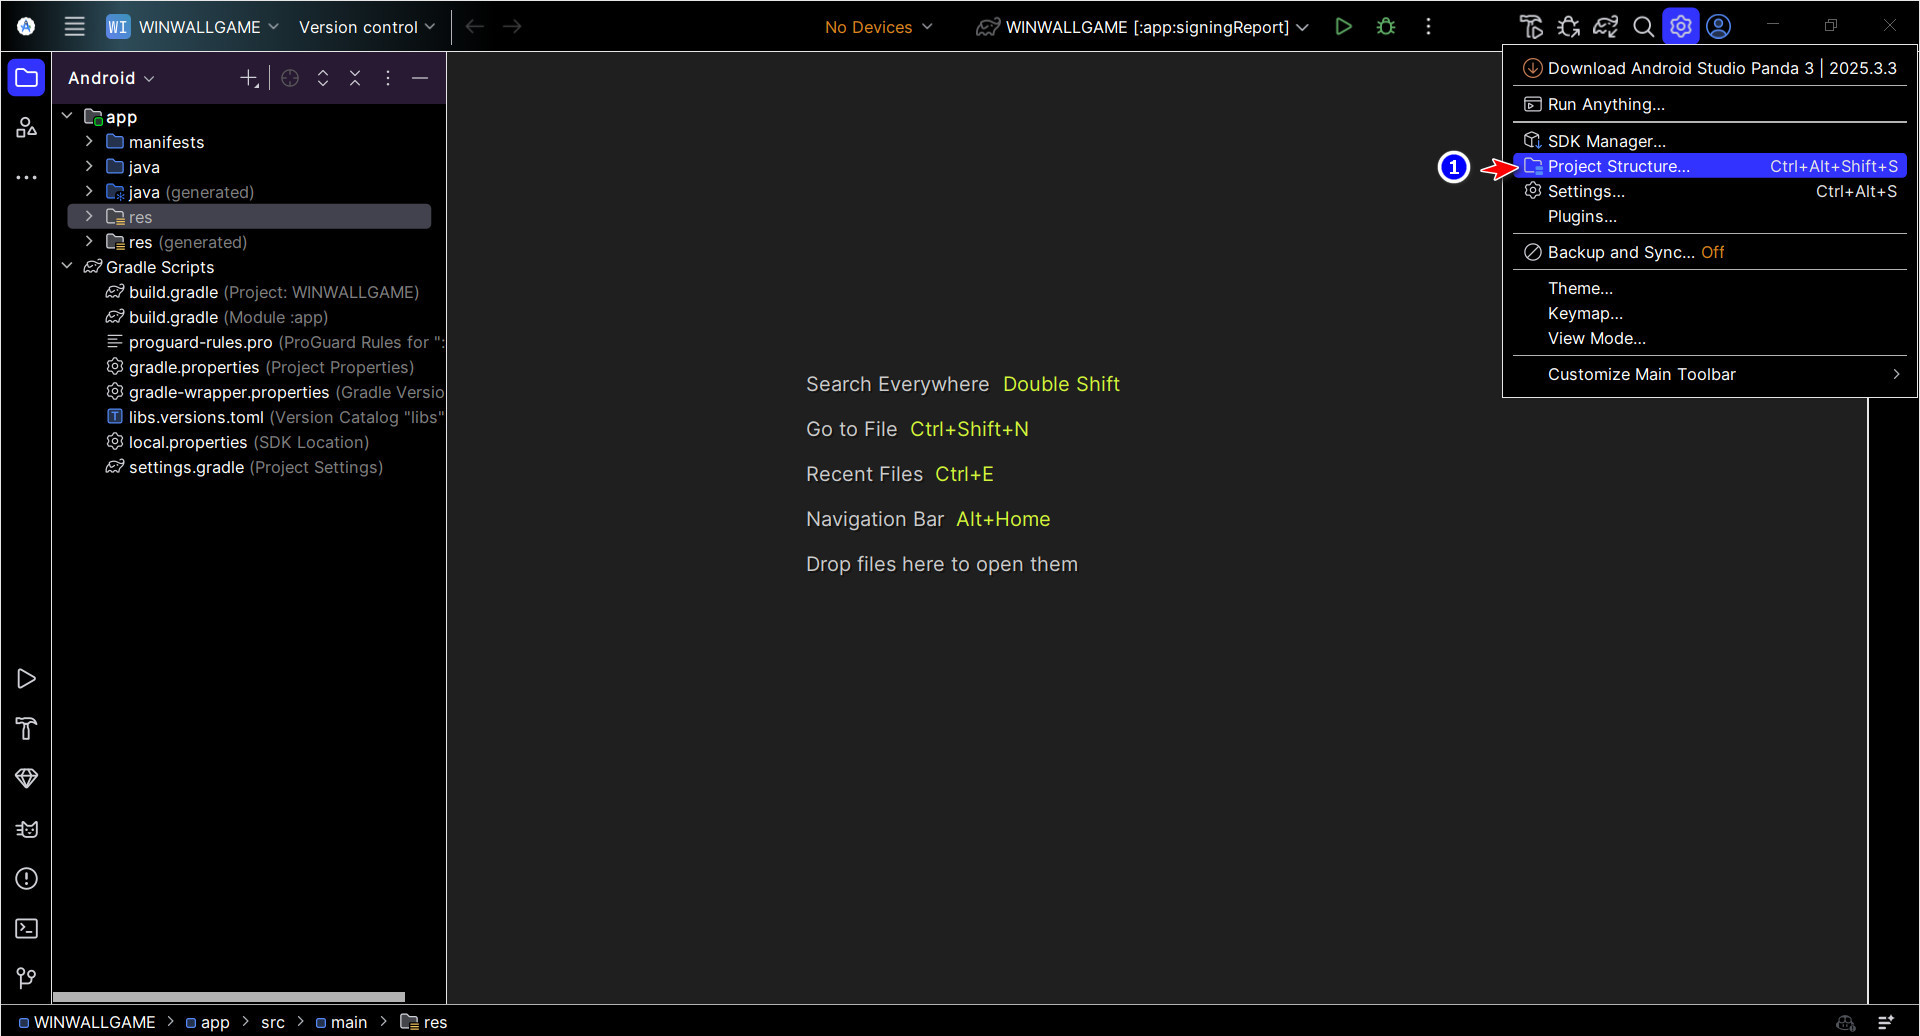
Open Project Structure in Android Studio
First, open your Android project in Android Studio. To configure the signing keys, you need to access the Project Structure dialog.
- Click on the Settings gear icon in the top-right toolbar of Android Studio.
- From the dropdown menu, select Project Structure... (shortcut:
Ctrl+Alt+Shift+S).
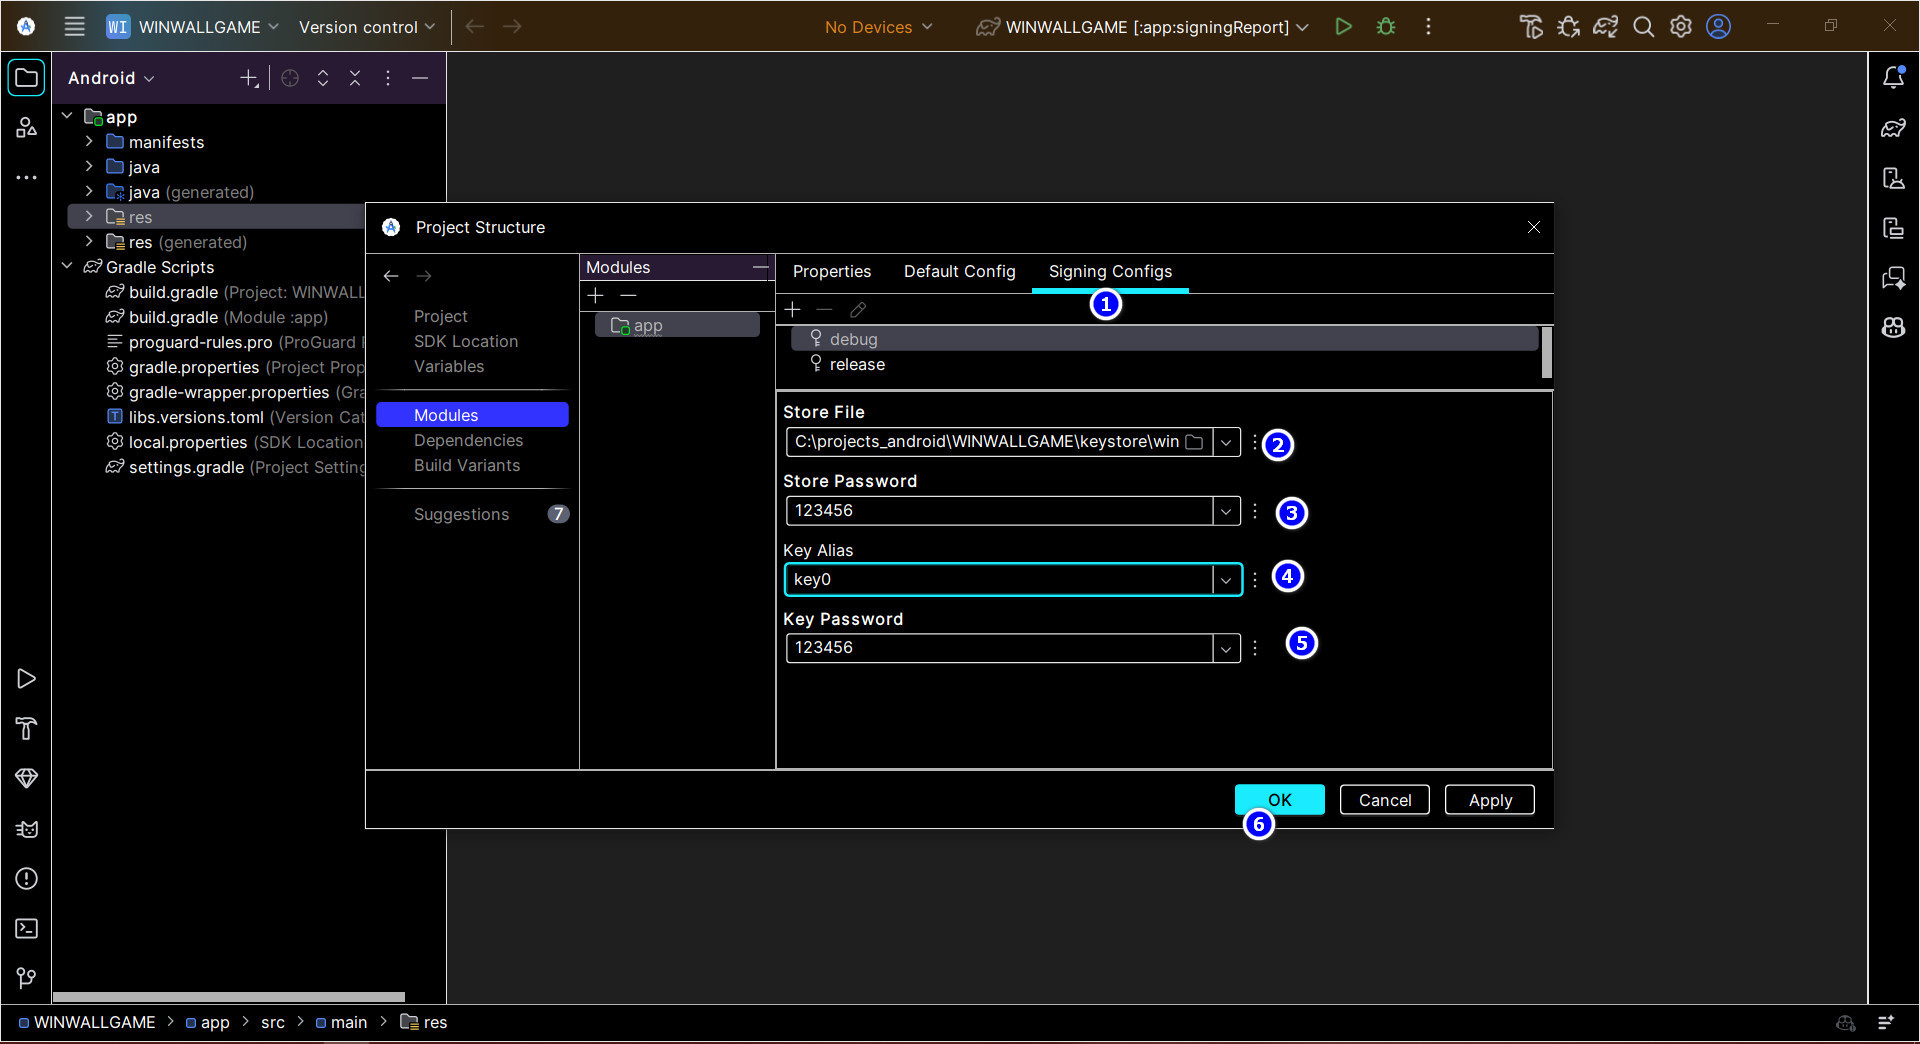
Configure Signing Keys
In the Project Structure dialog, you will configure the Signing Configs needed to generate your app's SHA-1 fingerprint for Firebase.
- In the left panel, click on Modules, then select your app module.
- Switch to the Signing Configs tab at the top.
- Select the release configuration, then fill in the following fields as annotated in the image:
- 2 Store File — Path to your keystore file (e.g.,
C:\projects_android\...\keystore\winwallgame). - 3 Store Password — The password for the keystore.
- 4 Key Alias — The alias of the signing key (e.g.,
key0). - 5 Key Password — The password for the key alias.
Once everything is filled in, click OK 6 to save.
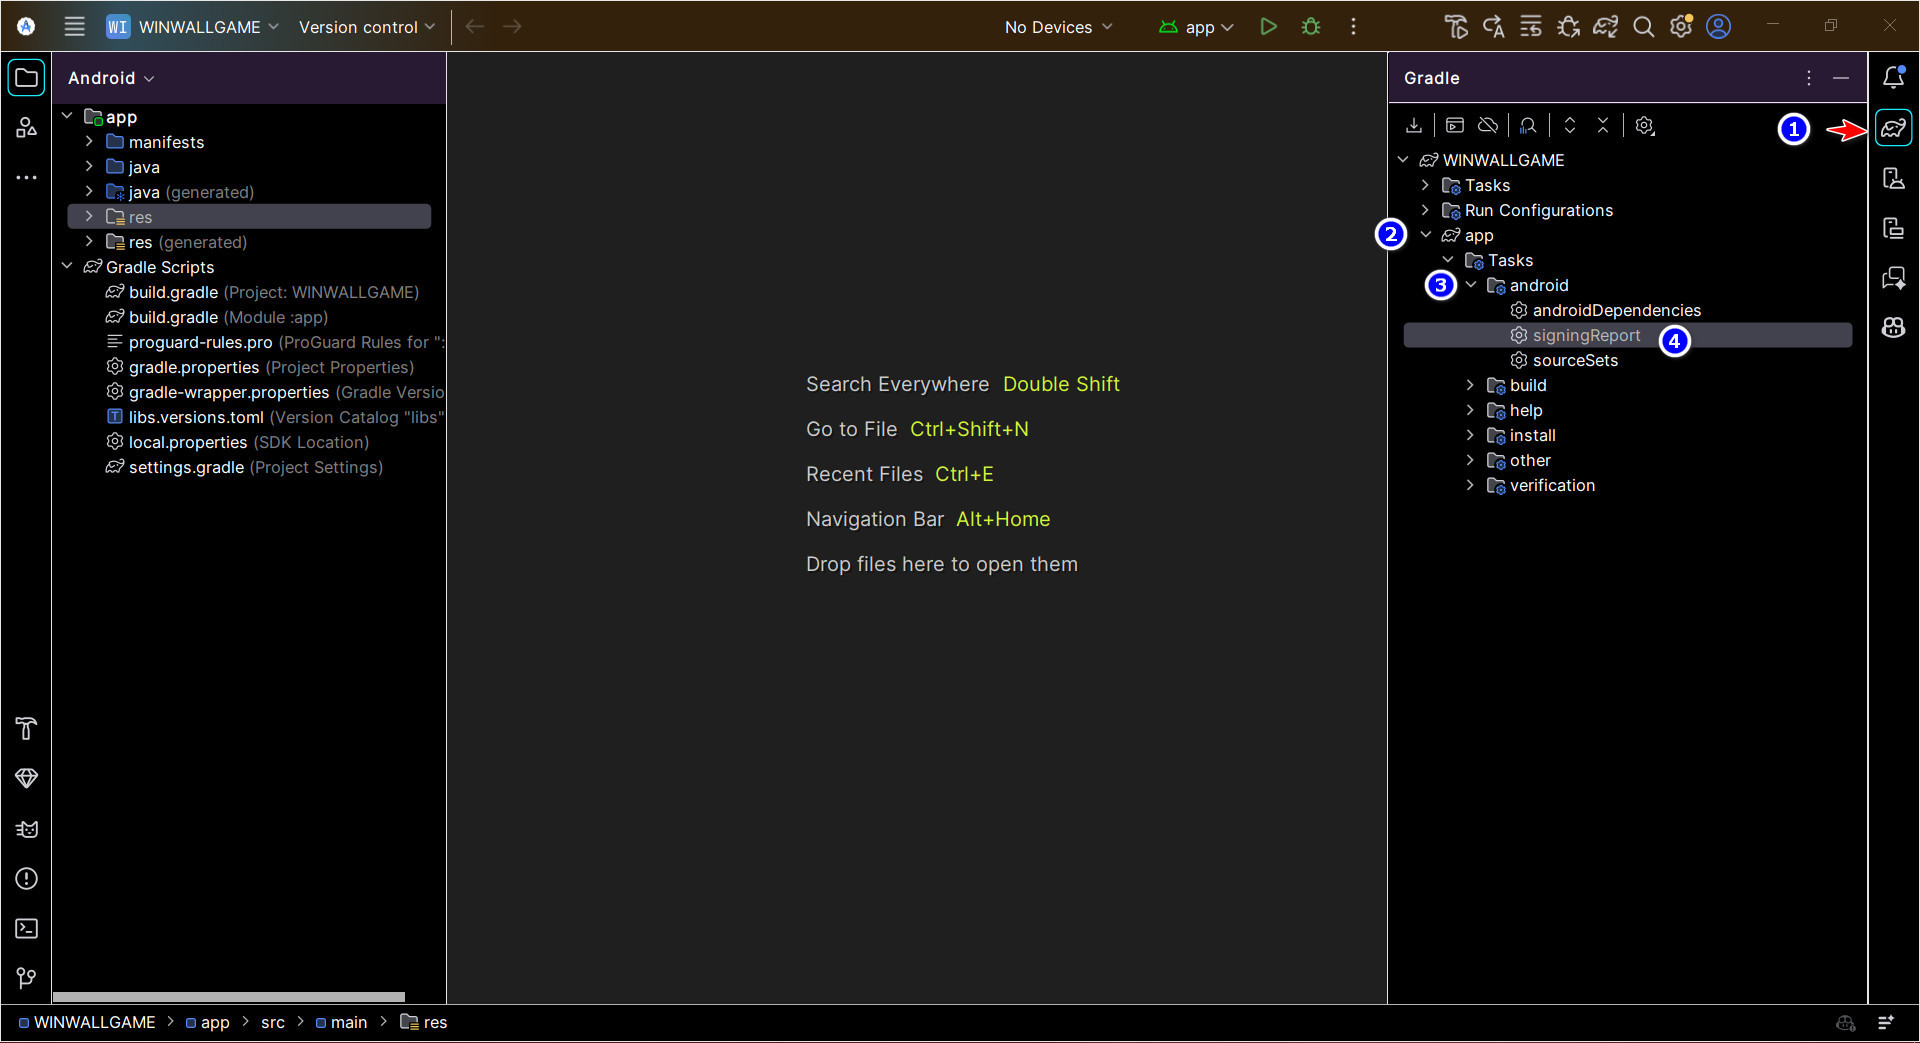
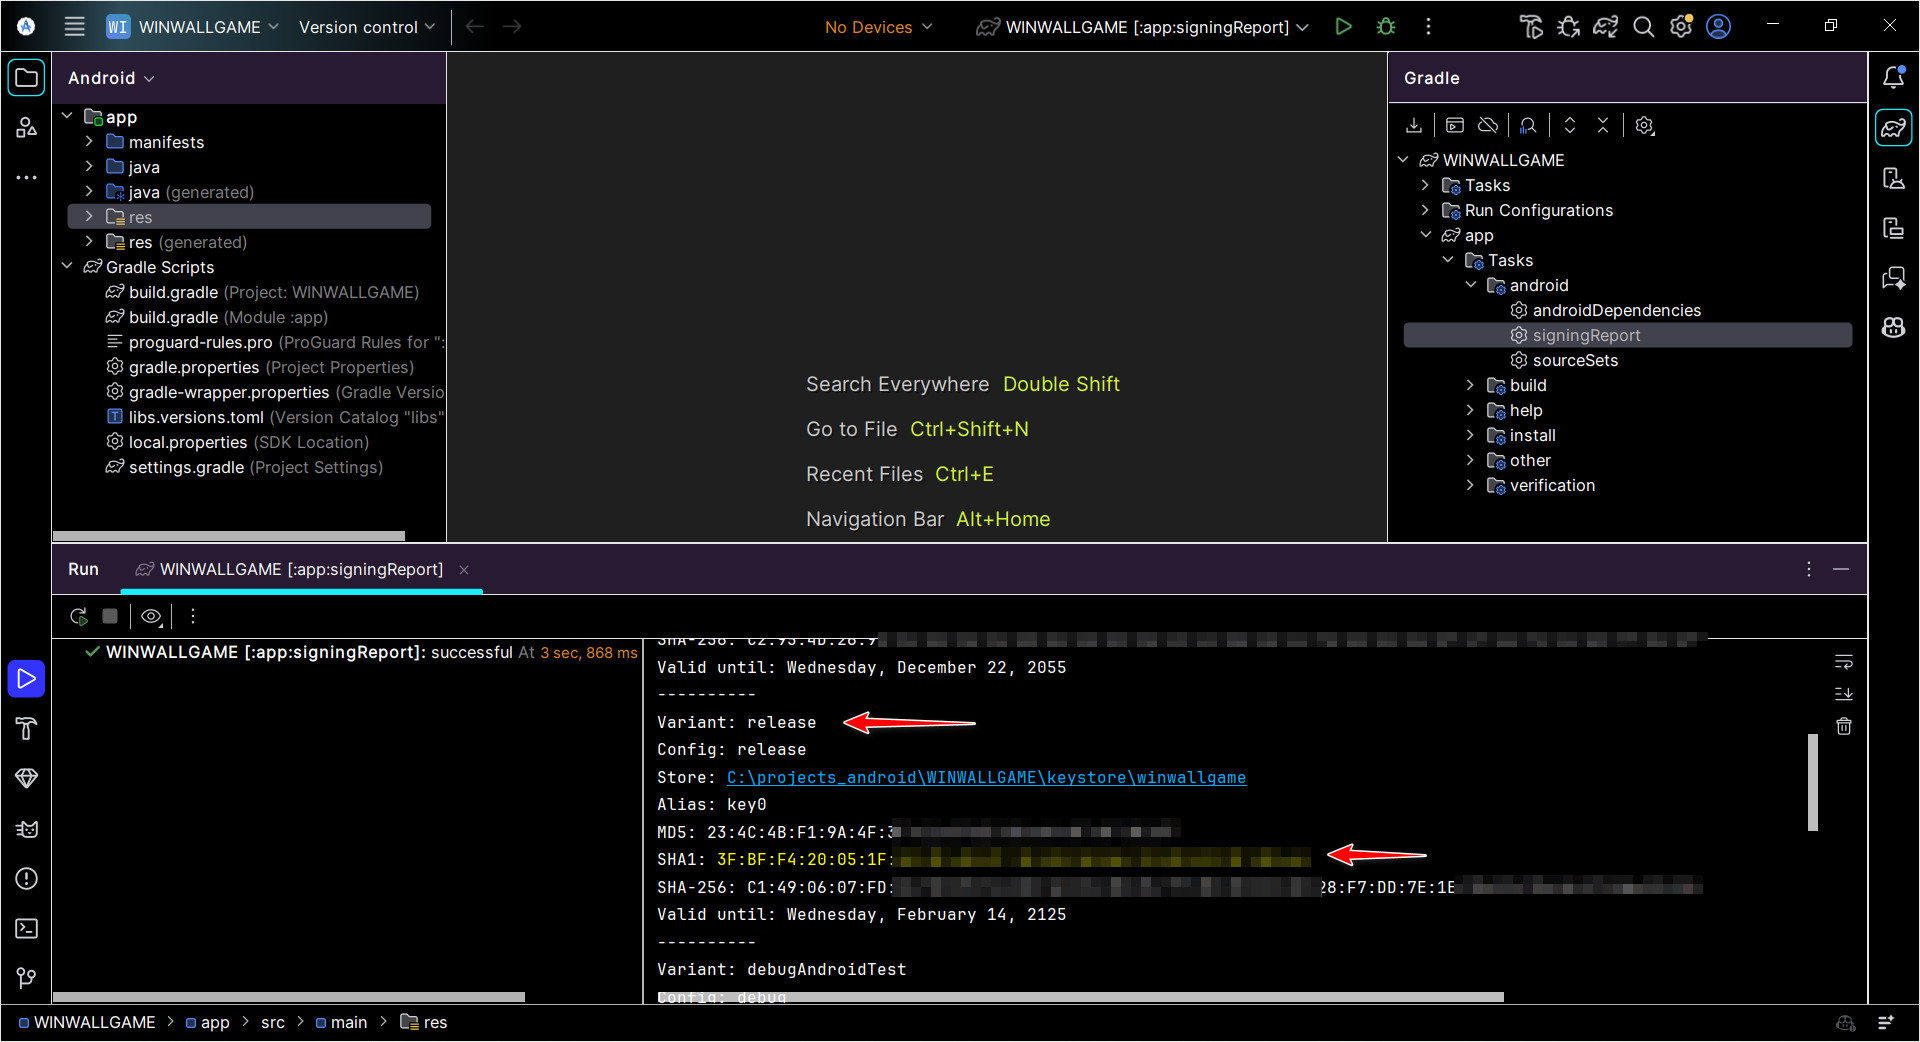
Run the Signing Report to Get SHA-1
Now you need to extract the SHA-1 fingerprint from your release signing key. Firebase requires this to link your Android app securely.
- 1 Open the Gradle panel on the right side of Android Studio (click the elephant icon if it's collapsed).
- 2 Expand your project name → app.
- 3 Expand Tasks → android.
- 4 Double-click on signingReport to execute it.
Copy the SHA-1 Fingerprint
After the signingReport task completes, the output will appear in the Run panel at the bottom of Android Studio.
- Scroll through the output and locate the section for Variant: release (highlighted with a red arrow).
- Find the line that starts with SHA1: — this is your release SHA-1 fingerprint (highlighted in yellow with a red arrow).
- Select and copy the entire SHA-1 value (e.g.,
3F:BF:F4:20:05:1F:...).
Add SHA-1 to Firebase & Download google-services.json
Now head to the Firebase Console, open your project, and go to Project Settings (gear icon) → scroll down to Your apps section.
- 1 Select your Android app from the list. You will see your app's Package name displayed there.
- 2 Scroll down to the SHA certificate fingerprints section. Click Add fingerprint and paste the SHA-1 value you copied from Android Studio in the previous step.
- 3 After adding the fingerprint, click the google-services.json button to download the updated configuration file. You will need to place this file in your Android project's
app/directory.
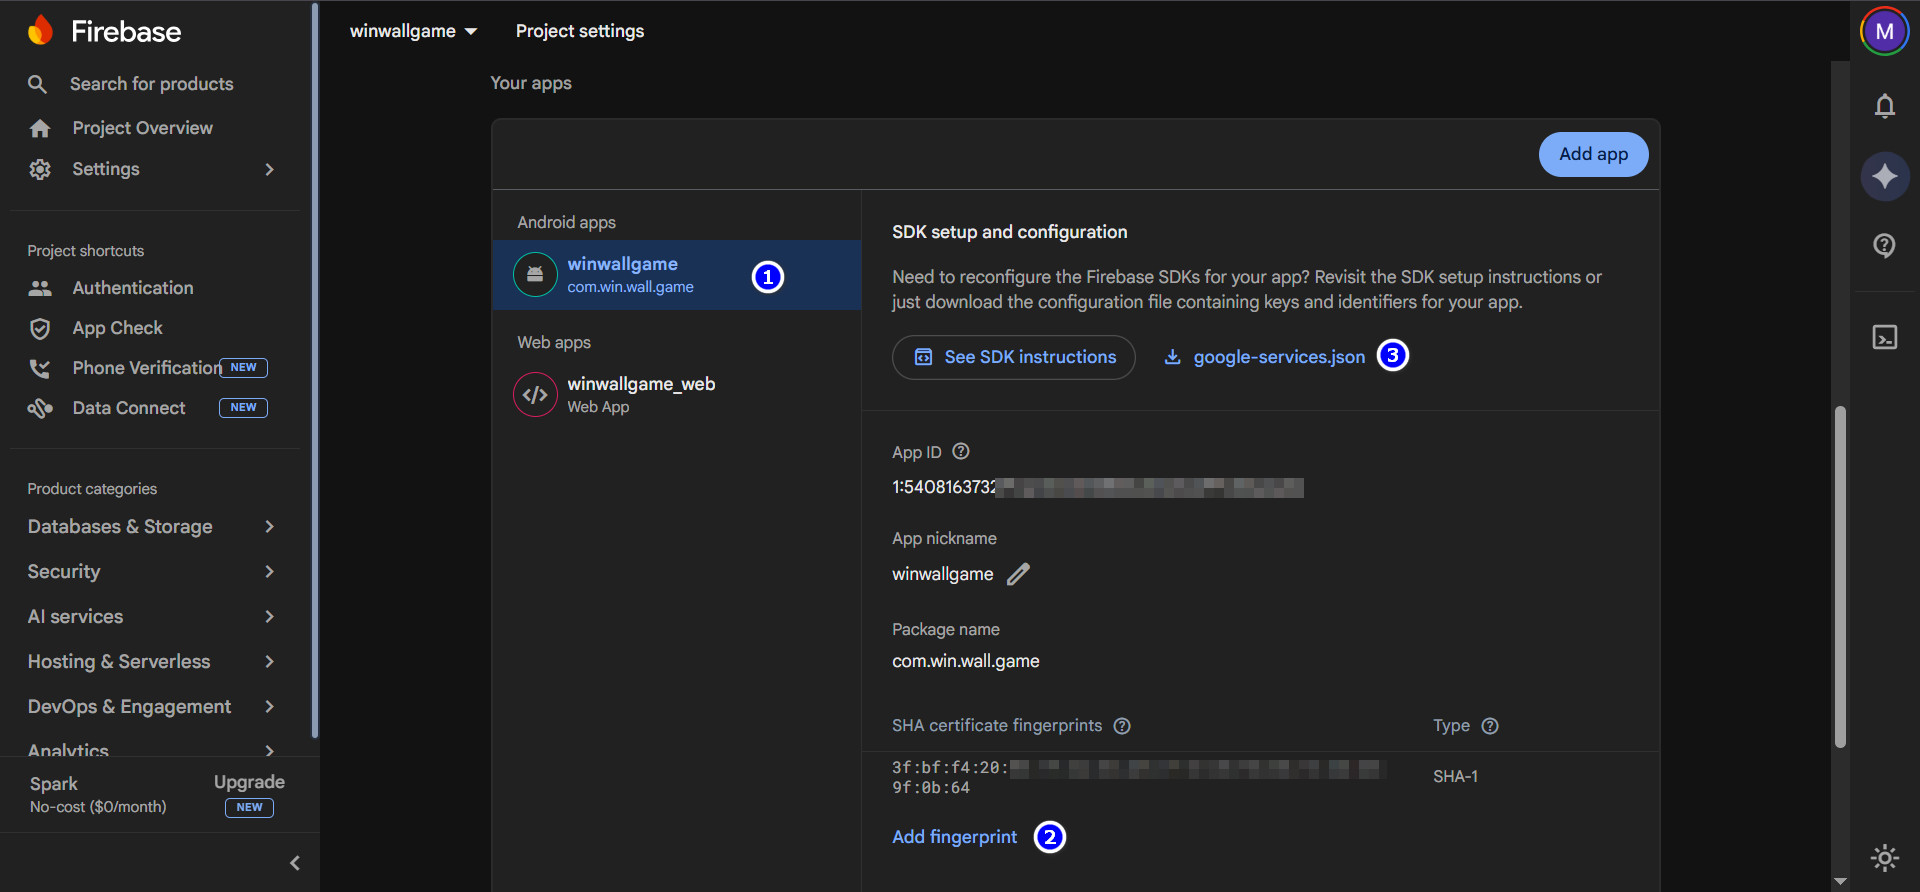
google-services.json, replace the existing one in your Android Studio project under the app/ folder, then re-sync Gradle.
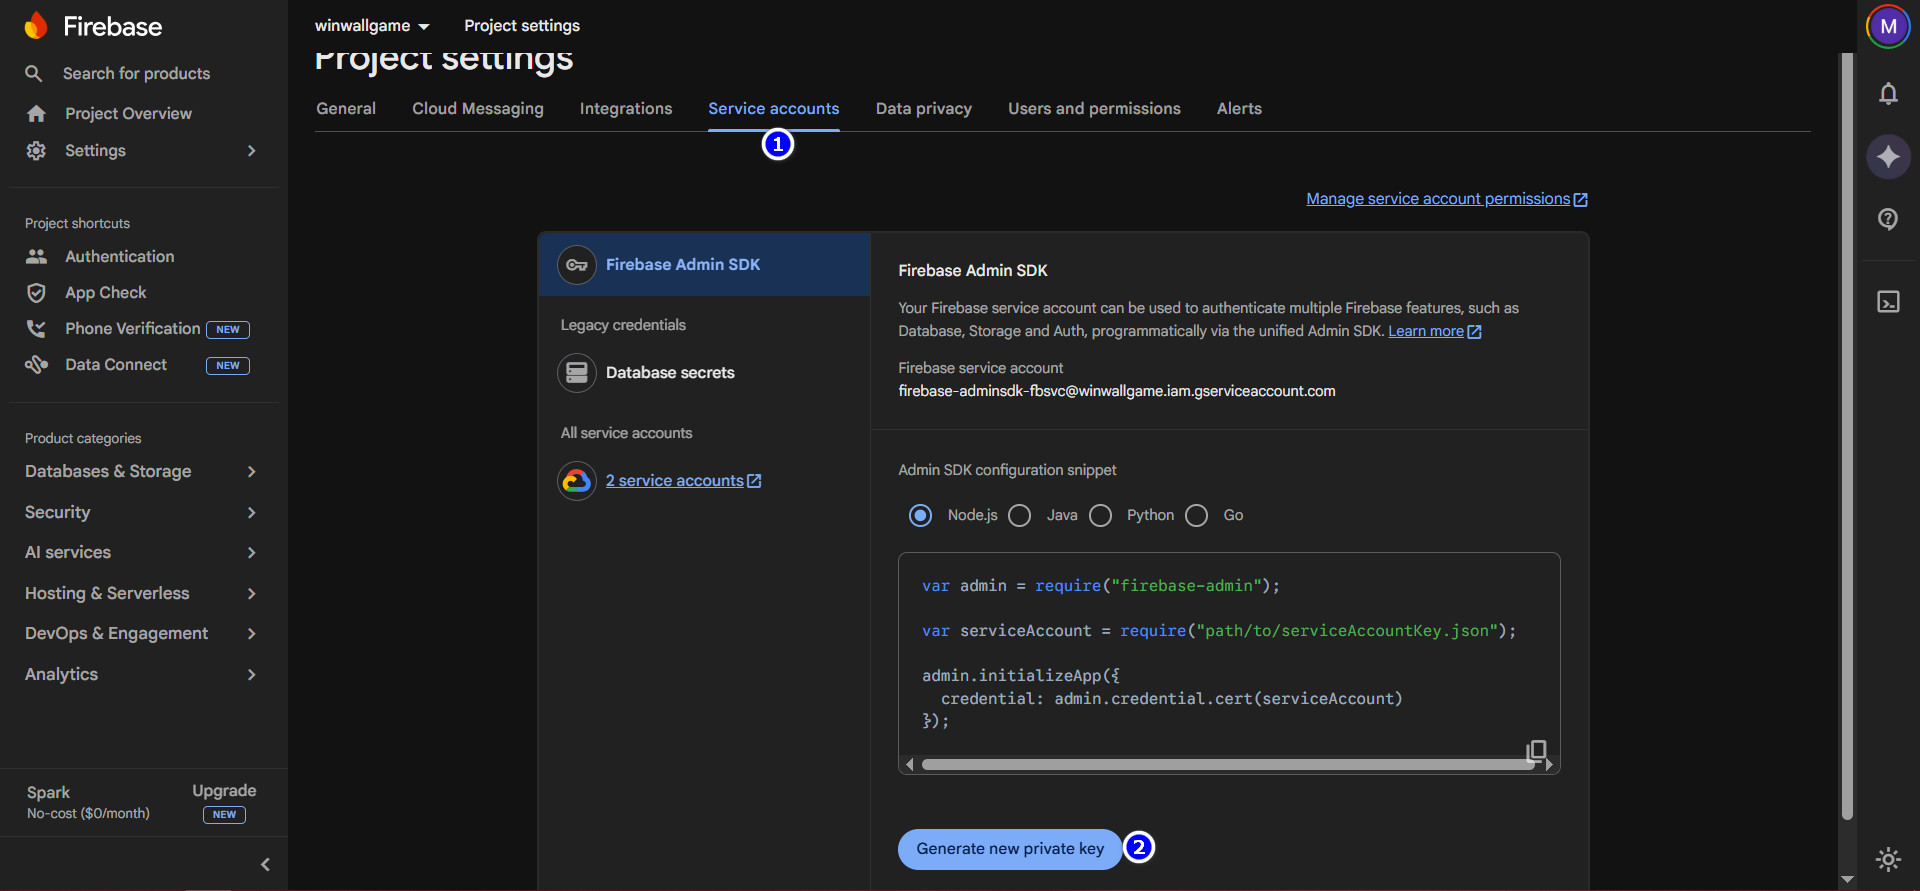
Generate the Firebase Private Key
Still in Firebase Console → Project Settings, switch to the Service accounts tab at the top.
- 1 Click on the Service accounts tab.
- You will see the Firebase Admin SDK section with your service account email.
- 2 Click the Generate new private key button at the bottom.
- A confirmation dialog will appear — click Generate key. A JSON file will be downloaded to your computer automatically.
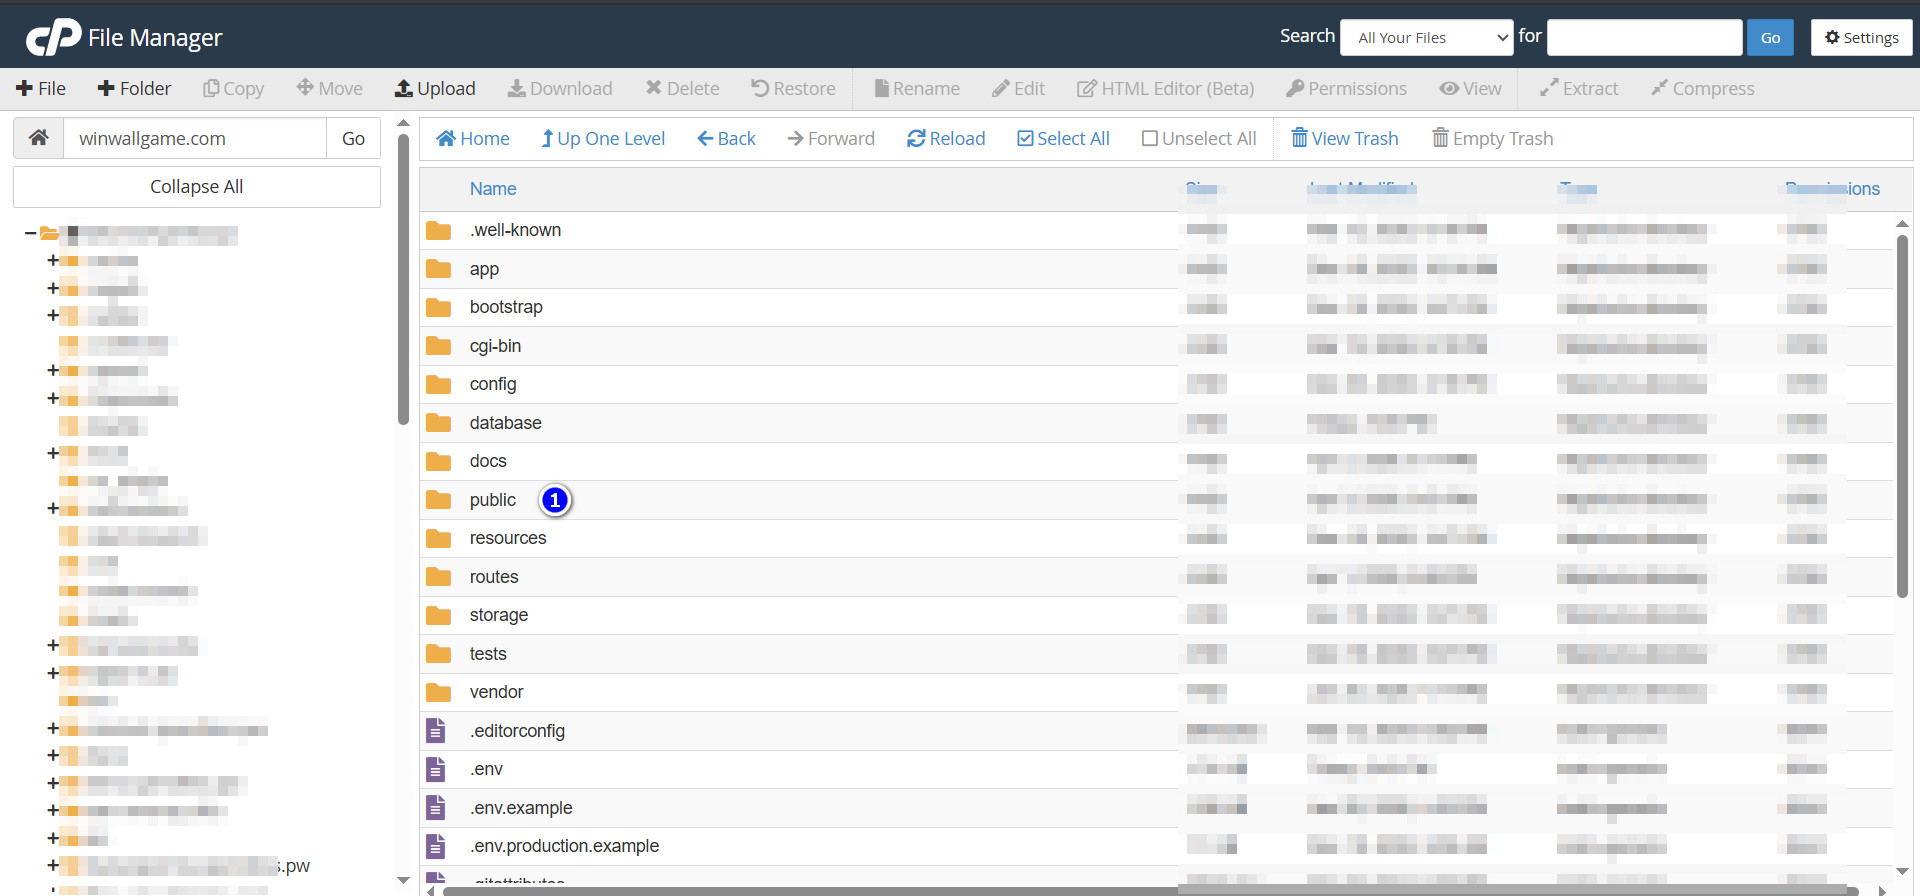
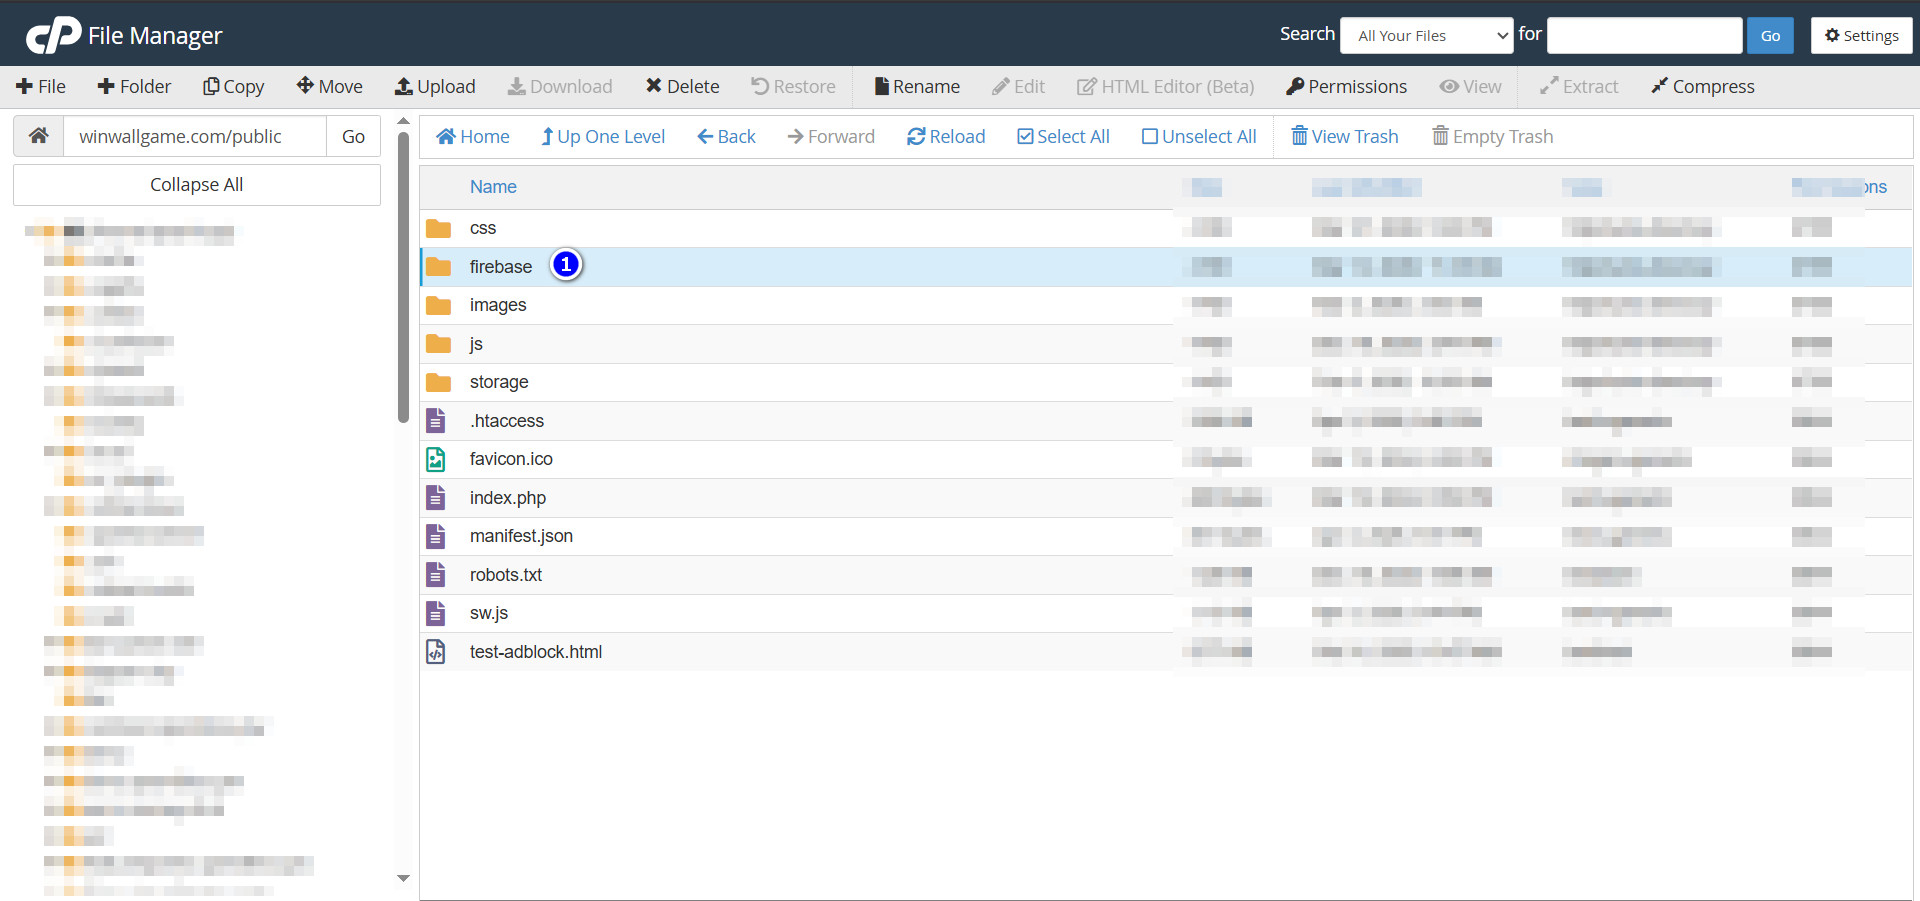
Navigate to the Public Folder on Your Hosting
Now you need to upload the downloaded private key file to your website's hosting server. Log into your cPanel and open the File Manager.
- Navigate to your website's root directory (your domain folder).
- You will see the standard Laravel folder structure (app, bootstrap, config, database, public, resources, routes, storage, vendor, etc.).
- 1 Open the public folder — this is where your publicly accessible files live.
Locate the Firebase Folder
Inside the public directory, you will find several folders and files.
- 1 Look for the folder named firebase and open it. This is the dedicated directory where the Firebase service account key must be placed.
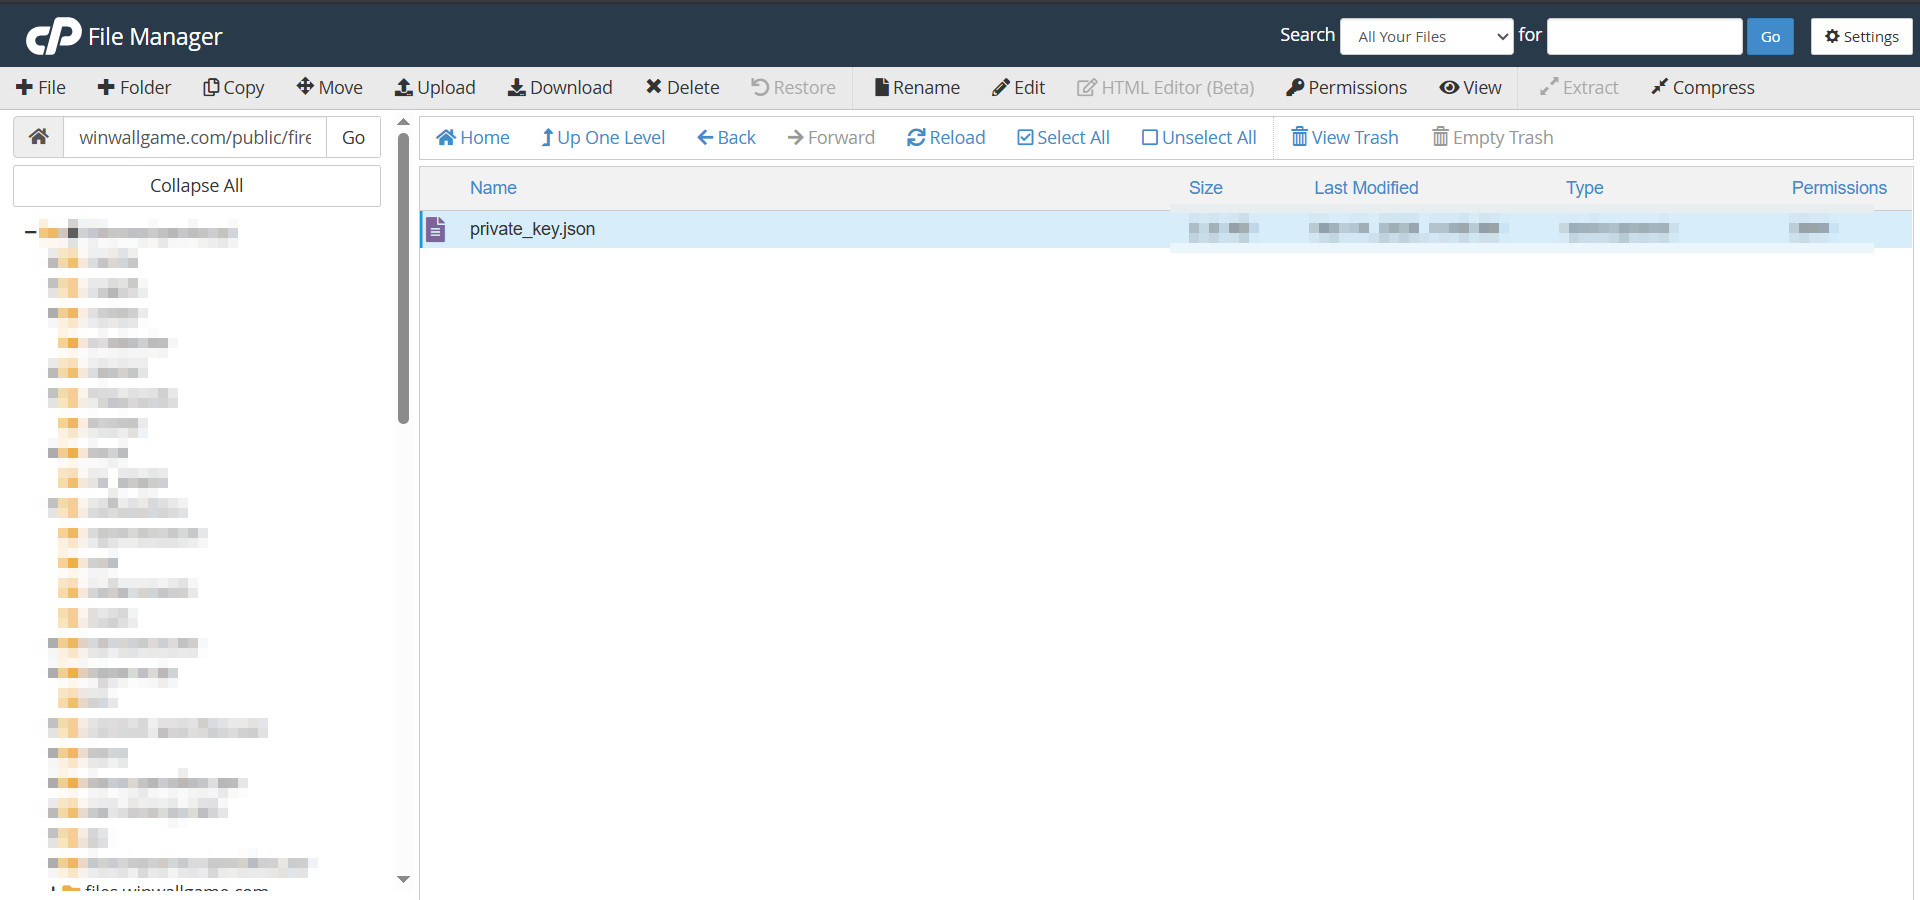
Upload the Private Key File
Inside the public/firebase folder, you need to upload the JSON file you downloaded from Firebase in Step 6.
- Click Upload in the cPanel toolbar and upload the downloaded JSON file.
- After uploading, rename the file to exactly:
private_key.json
Once uploaded, you should see the file private_key.json inside the firebase folder as shown below:
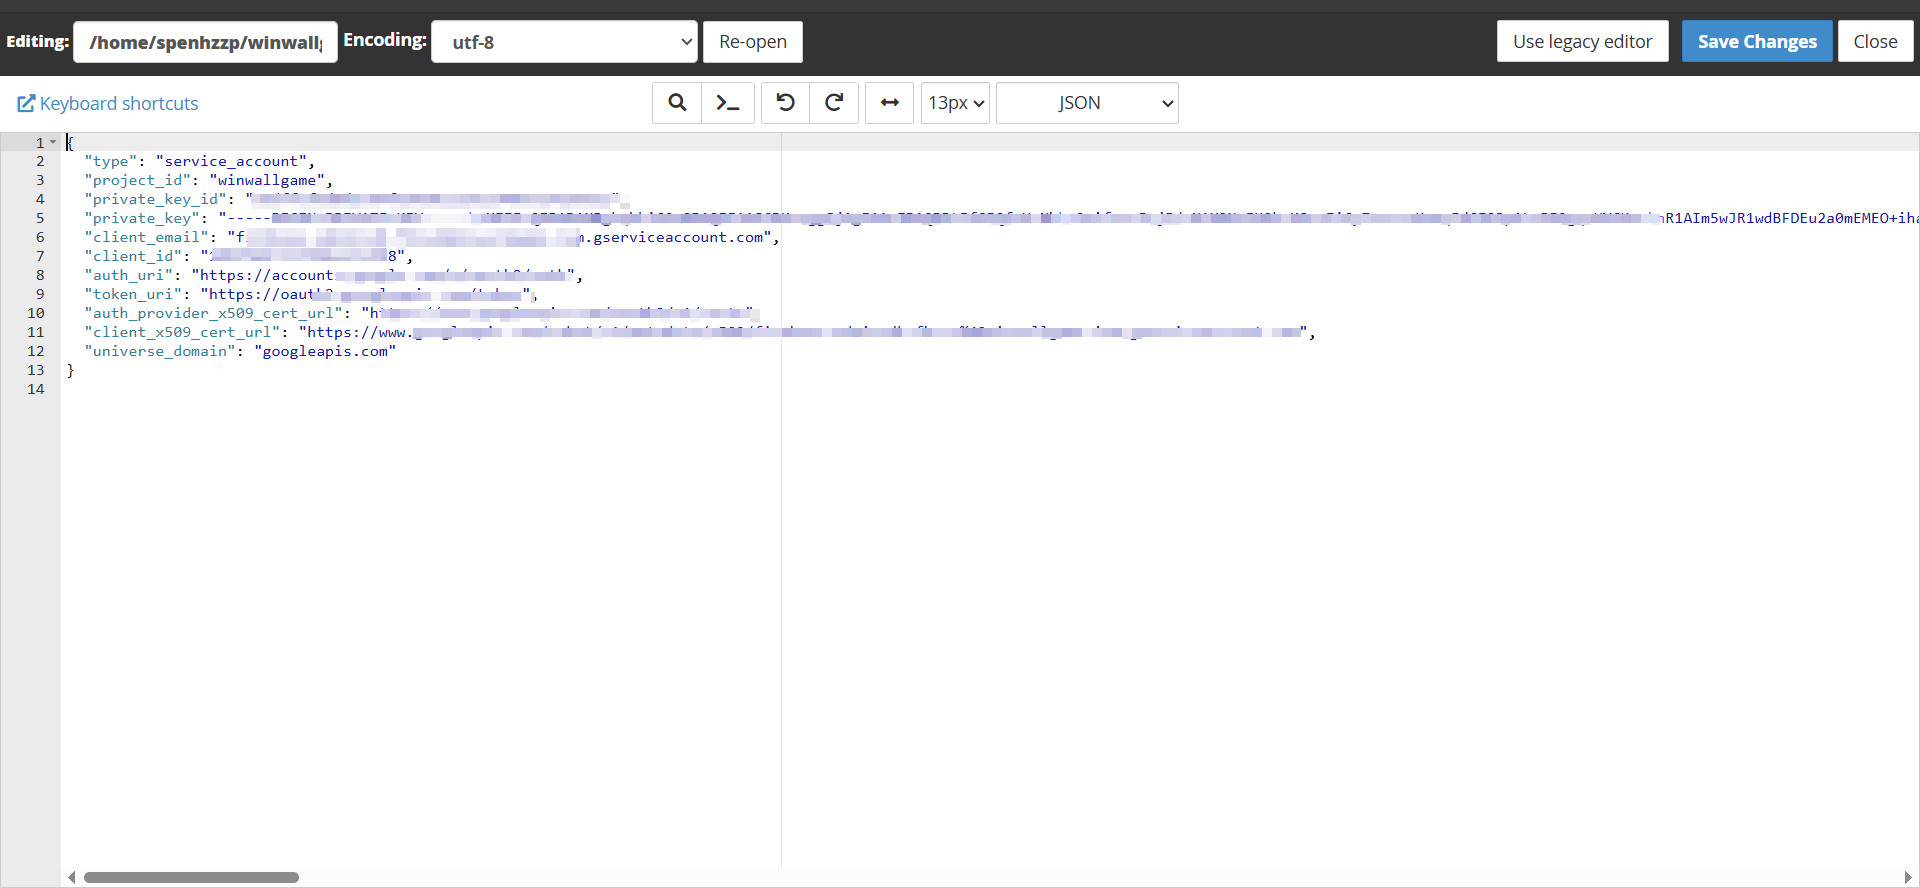
Verify the Private Key File Contents
As a final verification step, you can open the private_key.json file using the cPanel code editor to confirm its contents are correct.
- Right-click on private_key.json and select Edit (or View).
- Verify that the JSON structure contains all the required fields:
type,project_id,private_key_id,private_key,client_email,client_id,auth_uri,token_uri, etc. - Make sure the file is not corrupted or truncated. The JSON should start with
{and end with}.