Firebase Setup Guide
Step-by-step instructions to configure Phone Authentication
Create a Firebase Project
- Go to the Firebase Console and log in with your Google account.
- Click on the "Add project" button.
- Enter a name for your project and click "Continue".
- You can optionally disable Google Analytics for this specific project. Click "Create project".
- Wait for the setup to finish, then click "Continue" to enter your new project dashboard.
Enable Phone Authentication
- In the left sidebar menu, expand the "Build" section and click on "Authentication".
- Click the "Get Started" button.
- Select the "Sign-in method" tab at the top.
- Scroll down or look through the list of "Native providers" and click on "Phone".
- Toggle the switch to the "Enable" position and click "Save".
Register Your Web App
- Go back to the Project Overview by clicking the home icon or the project name in the top left corner.
- In the center of the dashboard, you will see "Get started by adding Firebase to your app". Click on the Web icon (</>).
- Enter an "App nickname" (e.g., "Web App").
- Leave the "Also set up Firebase Hosting" checkbox unchecked.
- Click "Register app".
Get Your Configuration Variables
After registering your web app, Firebase will display a code snippet containing your
firebaseConfig object. It looks like this:
Map to your .env file
Copy the values from the Firebase snippet and paste them into your project's .env file
exactly as follows:
Verify Domain for reCAPTCHA (Optional but Recommended)
To prevent abuse, Firebase Phone Auth uses reCAPTCHA. If you plan to deploy your application to a live domain, you must authorize it.
- Go to Authentication > Settings > Authorized domains.
- Click "Add domain".
- Enter your production domain (e.g., yourdomain.com) and click "Add".
(By default, localhost is already authorized for local development.)
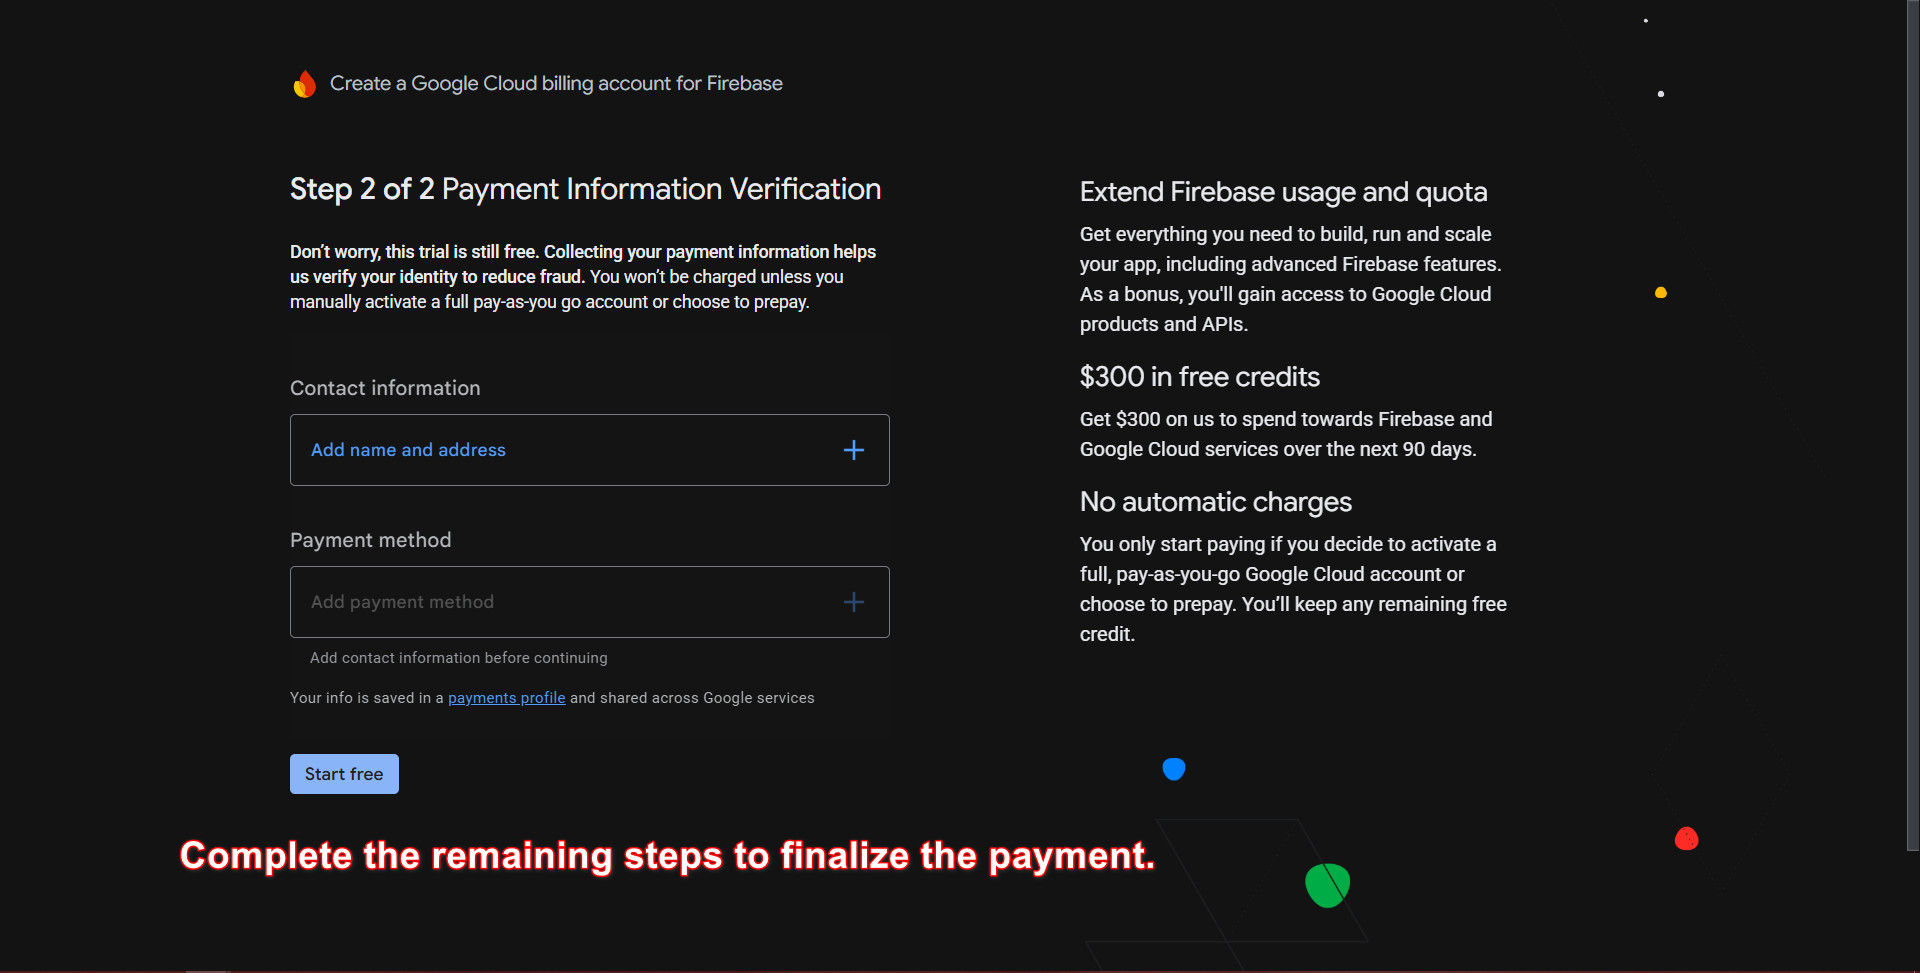
Fixing Error: auth/billing-not-enabled
Due to recent Google security policy changes, sending SMS codes now requires a Blaze Plan (Pay as you go), even for testing. The free Spark plan no longer supports Phone Authentication. However, you will still receive a generous free tier of 10,000 SMS verifications per month.
Failed to send verification code. Firebase: Error (auth/billing-not-enabled).
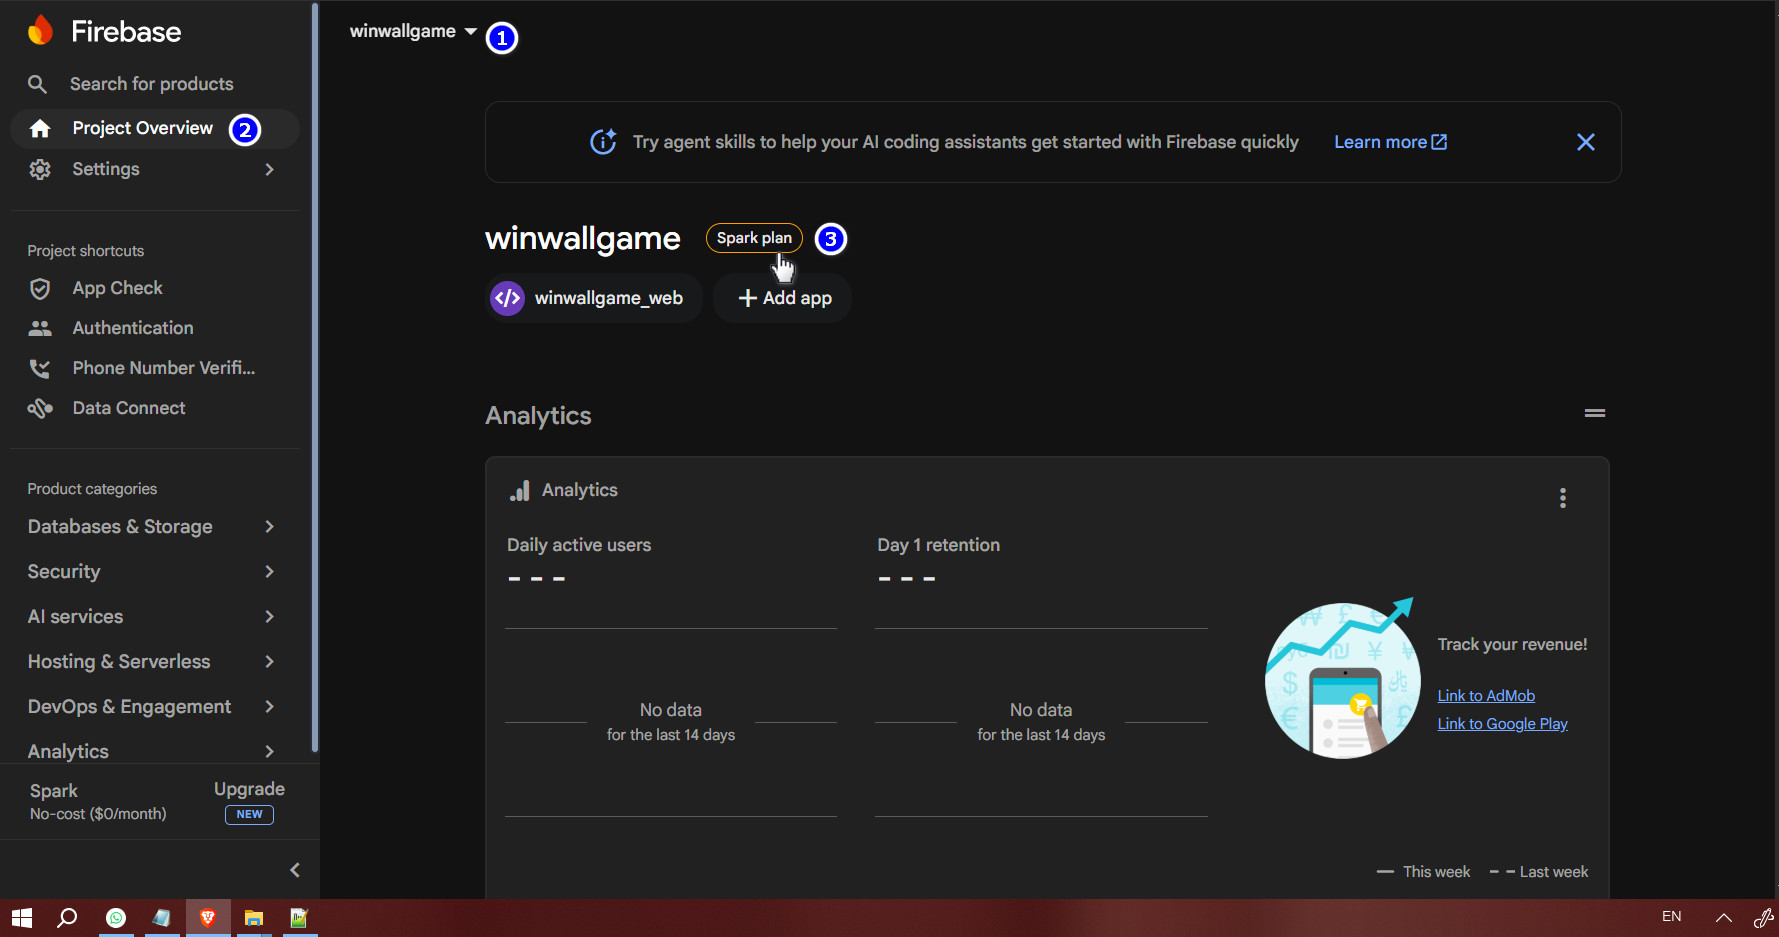
- Go to the Firebase Console and open your project.
- In the bottom left corner of the menu (or on the project overview page), locate your current plan, which usually says "Spark plan" under Usage and Billing.
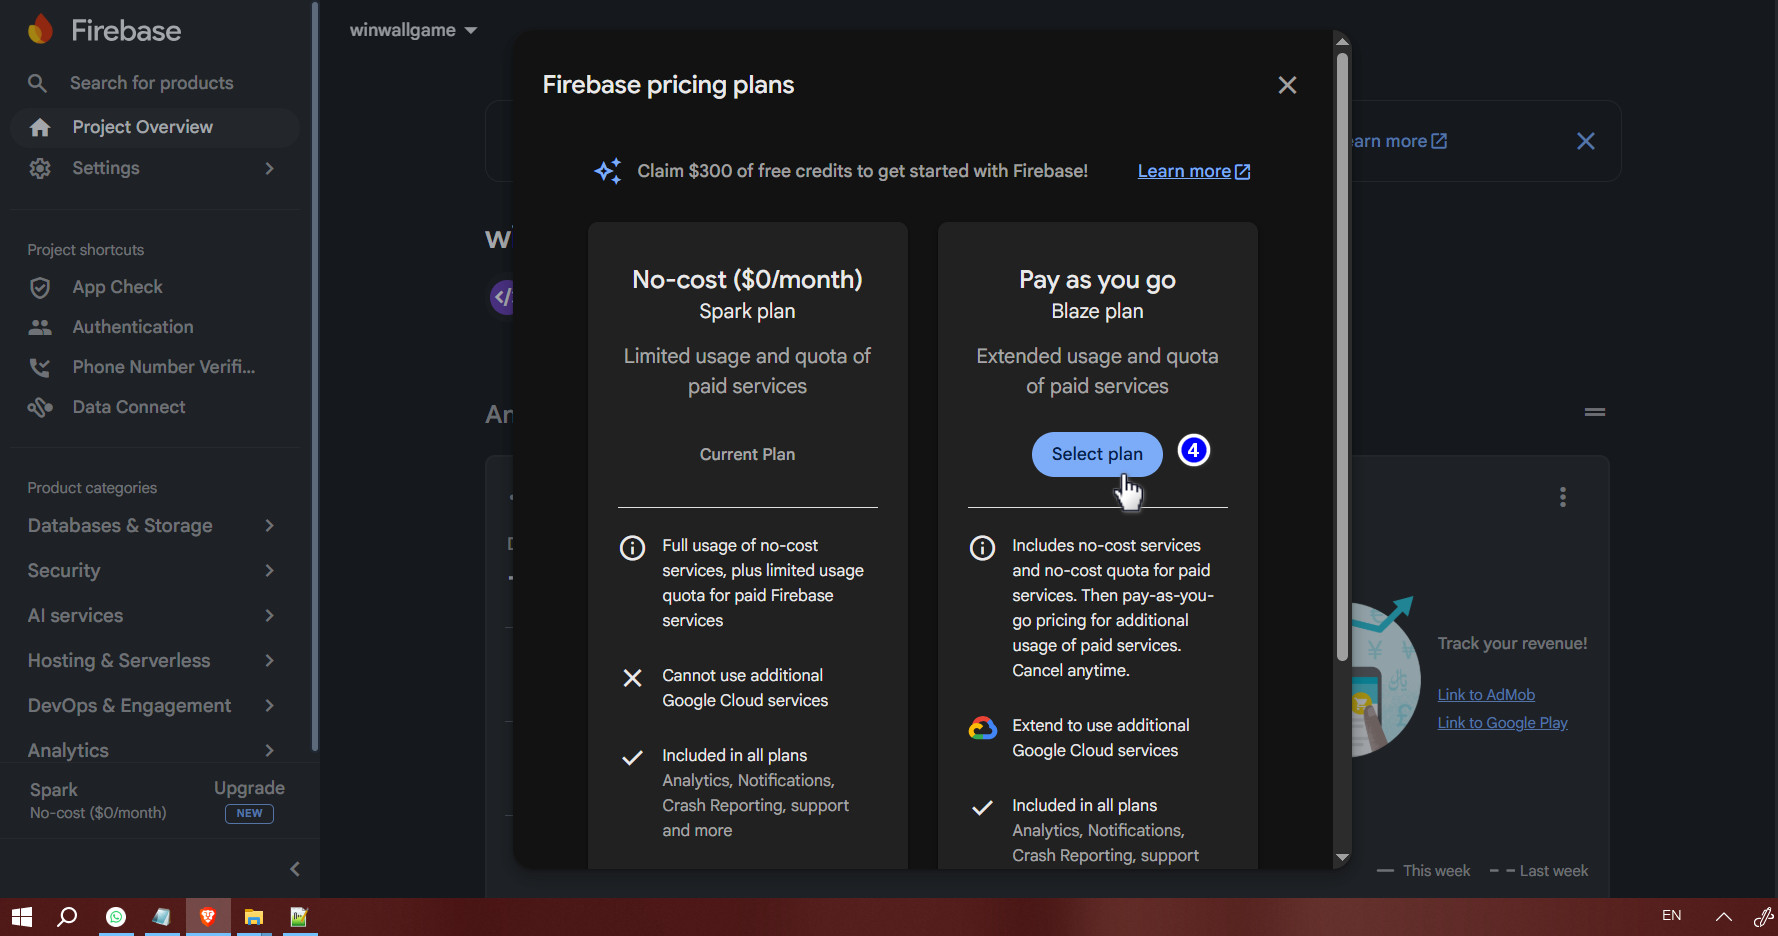
- Click the "Upgrade" button next to your plan.
- Select the "Blaze plan" (Pay as you go) option.
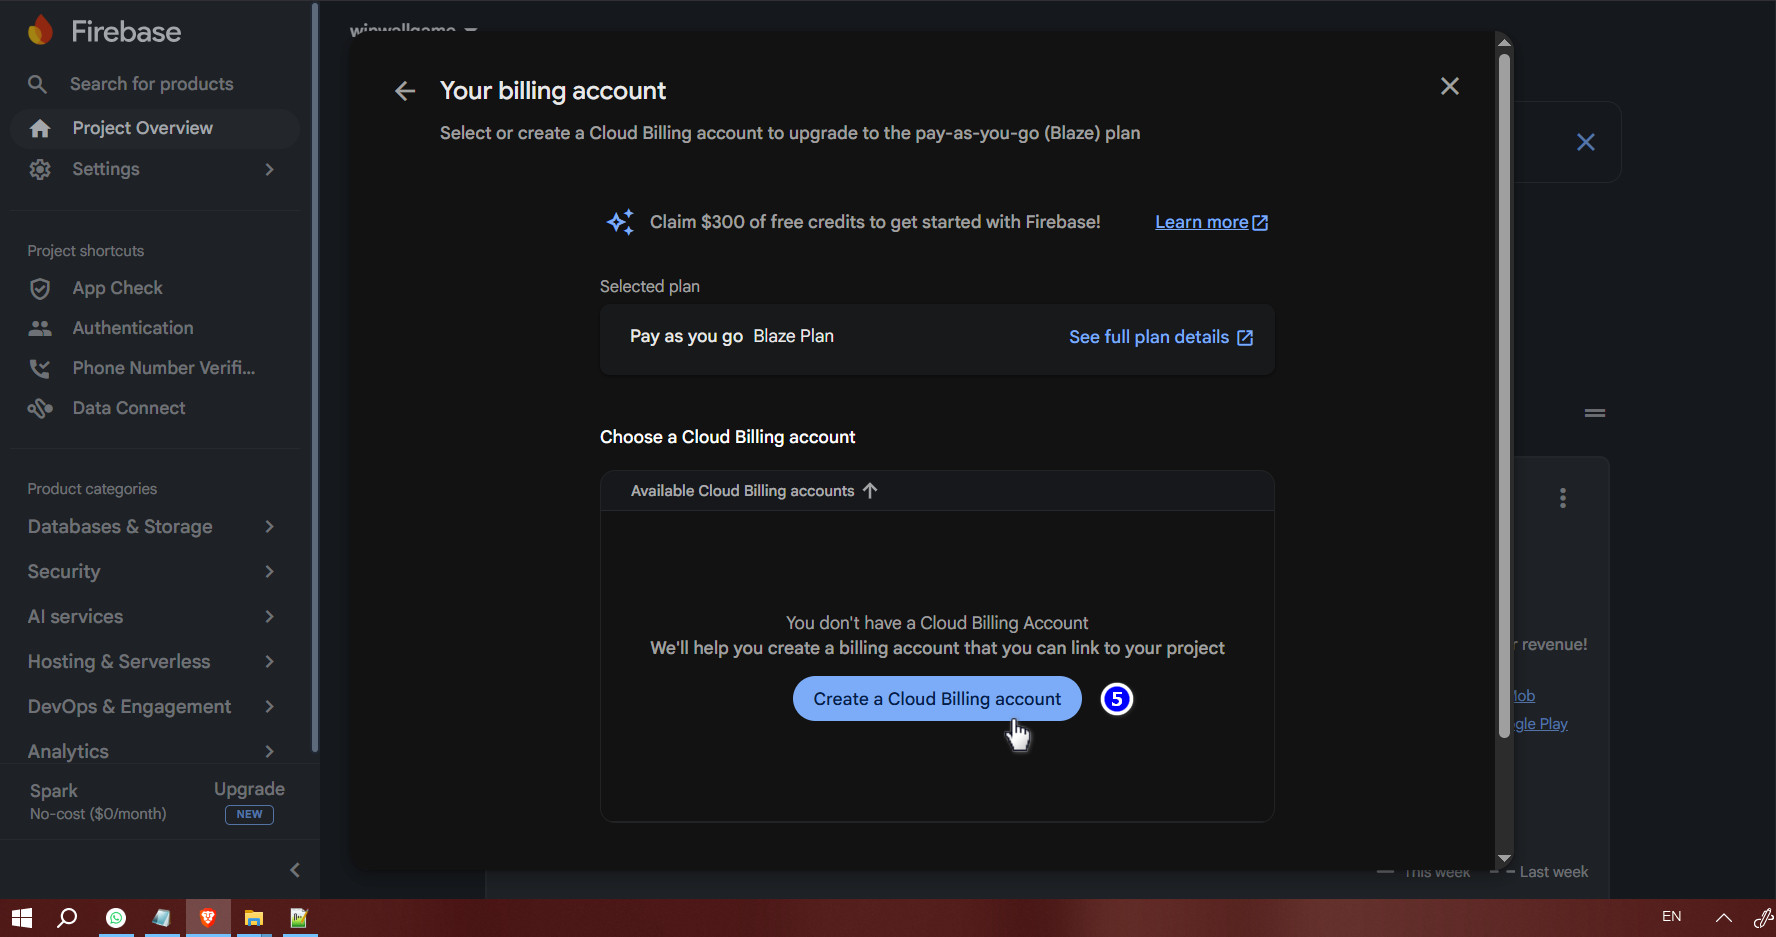
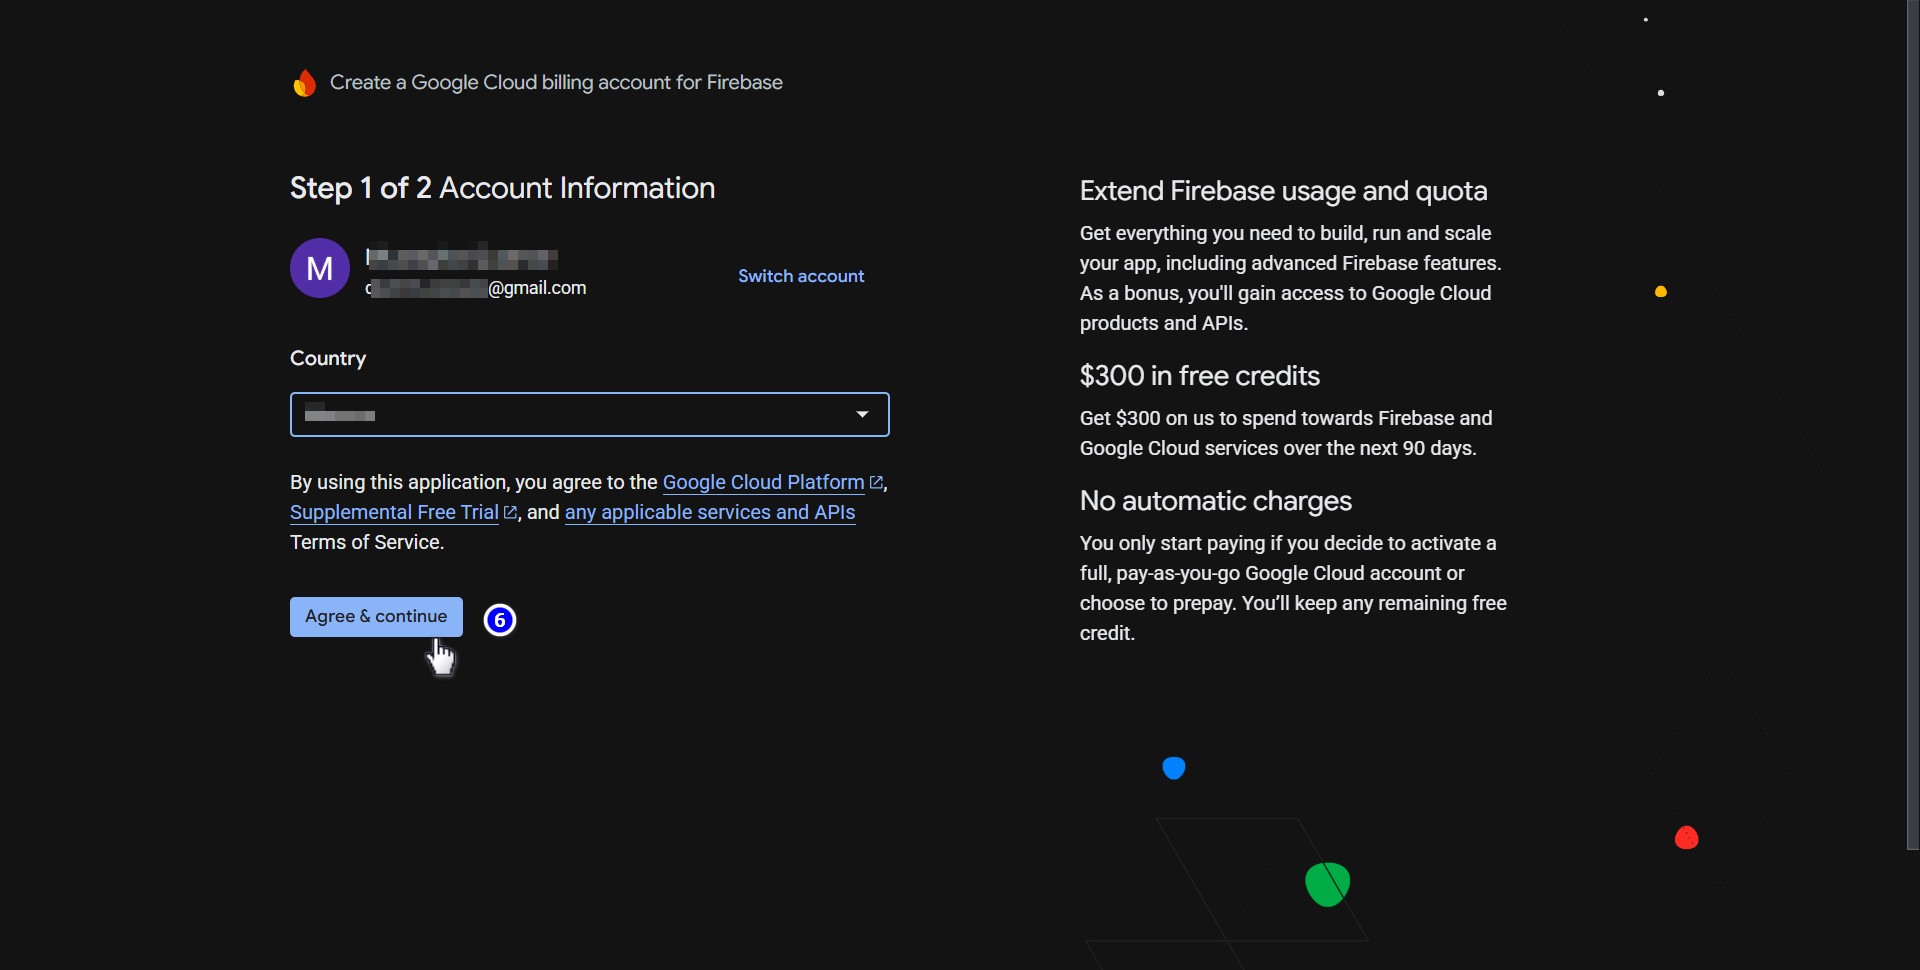
- Follow the prompts to set up a billing account by linking your credit or debit card through Google Cloud. (Remember: you will NOT be charged unless you exceed the 10,000 free requests per month).
- Once the plan is successfully upgraded to Blaze, return to your website and attempt to verify your phone number again. The code should arrive instantly!
Identity Toolkit API, but upgrading to the Blaze plan usually
handles everything automatically.